I've played MESBG for a couple of years now, and recently got introduced to Tabletop Simulator as a way of playing it online. There have been some significant improvements to the user experience recently (credit to Bazuzo in the MESBG Discord Server) which has made the existing online guides and videos a bit awkward to follow, so I thought I would write an update guide on how to get started.
Requirements #
To play you'll need the following:
- Laptop/PC
- Mouse (Highly Recommended, playing this via a trackpad is not for the faint hearted)
- Steam: Tabletop Simulator
- Steam: "Middle-Earth: Strategy Battle Game | Start Here" Collection
- Steam: "Middle-Earth Strategy Battle Game | Valar FTC Maps" Collection
Tabletop Simulator #
The basis of playing MESBG online is through Tabletop Simulator (TTS). If you're not familiar with it, TTS is essentially a game with a physics engine focussed on tabletop gaming, allowing you to move pieces, flip cards and roll dice. Anyone from the community can then contribute mods to the game which add in customised content for a particular game, making it a great playground to play all of your favourite board games and war games online.
Downloading TTS #
Tabletop Simulator can be bought and downloaded on Steam.
It's often available at a discount, so do keep an eye out for a sale where it can be found for as cheap as $5.
Installing MESBG #
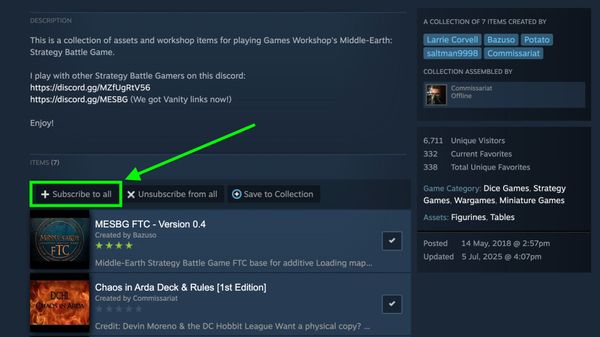
Whilst TTS is downloading and getting installed to your machine, you can head to the "Middle-Earth: Strategy Battle Game | Start Here" collection on Steam, found here, and click "Subscribe to all".
Installing Maps #
It's also recommended to subscribe to the "Middle-Earth Strategy Battle Game | Valar FTC Maps" which you can find here. This will make available a huge range of tournament-approved maps for you to play on.
Setting up a Game #
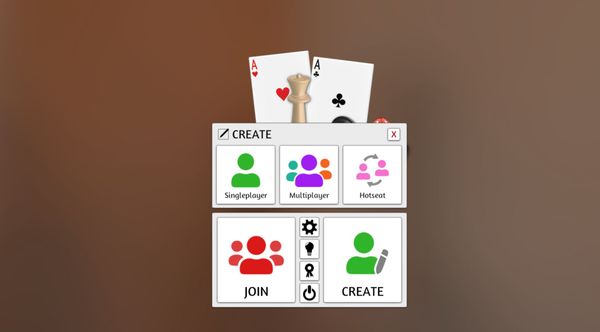
Open up Tabletop Simulator, and just to test this out, you can click Create > Singleplayer.
Then you'll be able to select which game you want to load into Tabletop Simulator. To load in the MESBG Collection that we subscribed to earlier, click "Workshop" and then find "MESBG FTC" and confirm that you want to load it.
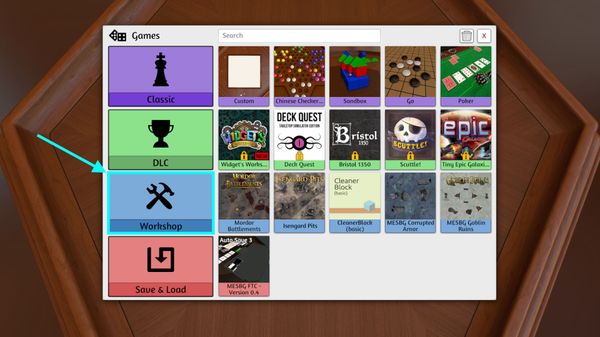
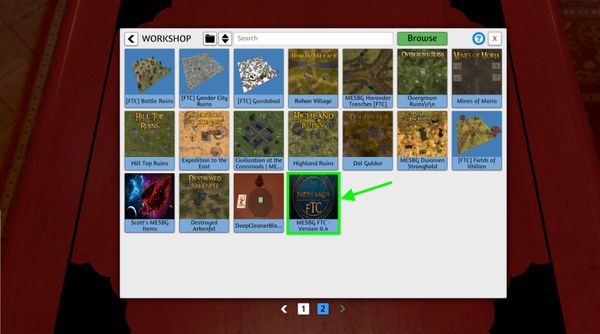
Screenshots to show where to find the "MESBG FTC" file to load MESBG into Tabletop Simulator.
Loading a Map #
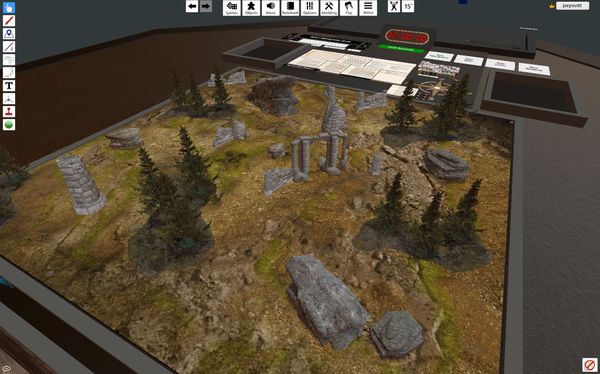
With the game loaded, we now need to pull in a map for us to play on. To do this, click the "Games" button at the top of the interface, and then return to the "Workshop" tab we used earlier.
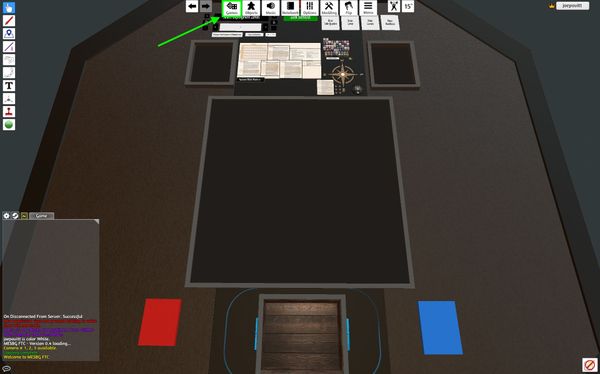
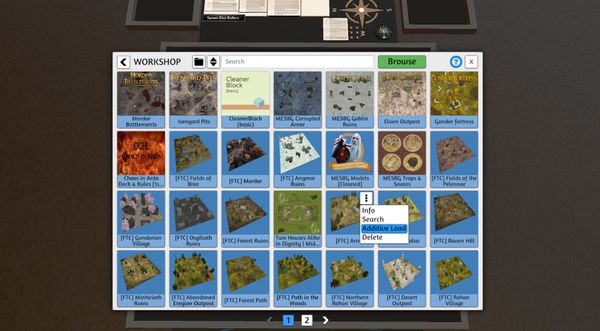
Screenshots showing how to load in a map to the MESBG Tabletop Simulator environment.
Here you will find a large collection of maps that were loaded as part of the Valar FTC Maps Collection we subscribed to earlier.
When you find a map you like, click the "Options" button, and then select "Additive Load".
Importing an Army #
A recent, and excellent update to the MESBG Tabletop Simulator experience, is the integration with Tabletop Admiral (TTA), the excellent MESBG list builder.
We won't cover the intricacies of the rules on how to build an army list in MESBG, but you can head to TTA here, build your army, and then get it in the format required for Tabletop Simulator by clicking the "Options" button in the bottom-right, and then select "TTS View".
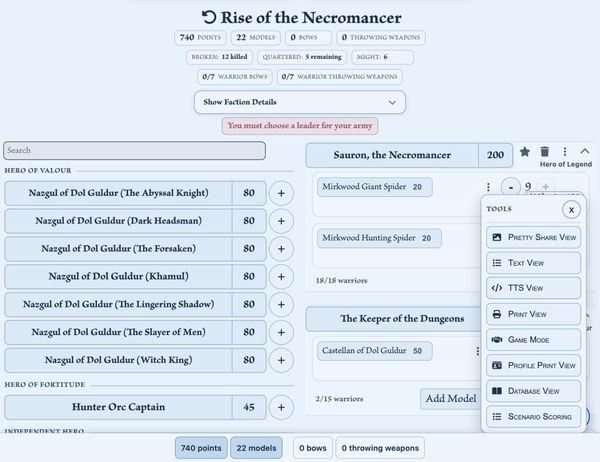
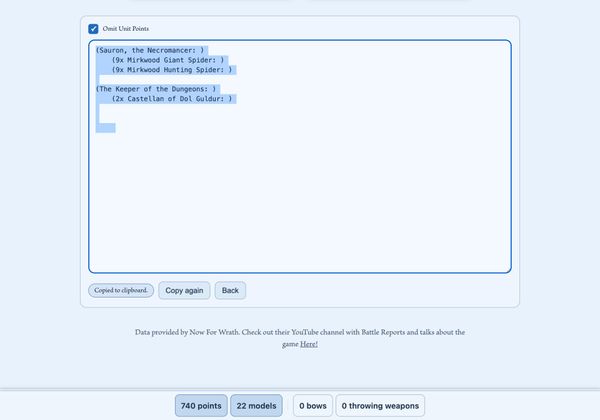
Screenshots of Tabletop Admiral, the MESBG List Builder, showing how you can export a list, read for Tabletop Simulator.
Copy the contents of the text box that is shown and then we will head back into Tabletop Simulator to import the army.
First, select the "Notebook" button at the top of the user interface, and paste the content into the text box that appears, and then close the dialog box.
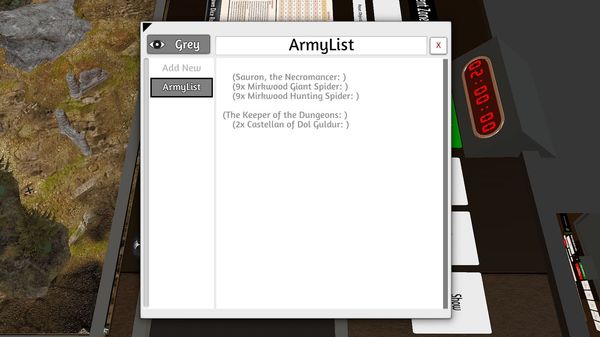
Then, you need to find the "Spawn Army" button, you'll find this at the north-end of the table.
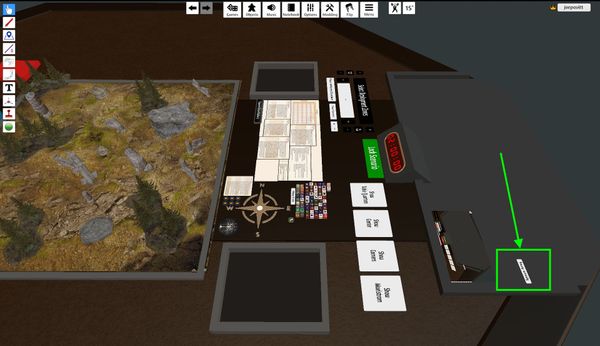
Once your army is spawned, you can select them and move them around.
A nice shortcut to be aware of at this point is selecting all of the models (click and drag your mouse to draw a box and select the models), then as you'll select them again, you'll notice they hover above the board, from here you can press 1, 2, 3, 4, etc. to automatically align them into rows and columns, which helps organise your army quickly.
Loading Additional Armies #
To load in the second army, and more, re-open the Notebook, replace the contents in the text box, close the modal and click the "Spawn Army" button again. Make sure you have moved the first army out of the way first, otherwise you just end up with a pile of virtual plastic.
Selecting a Scenario #
At the south-edge of the board, you can find quick reference guides for the scenario rules, and the collection of scenarios from the Matched Play Guide pools.
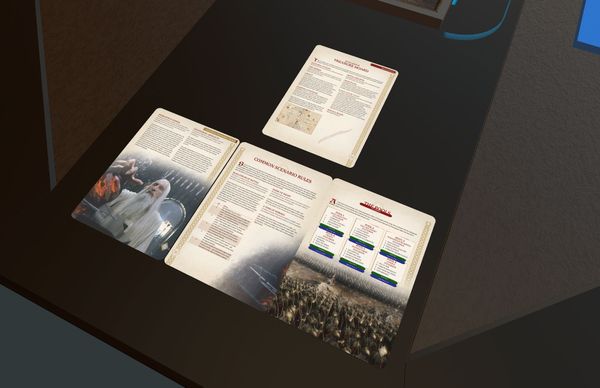
From here, you can select a specific scenario, load a random scenario from a specific pool, or select "Full Random" to load up a scenario from the full list of 24 available.
Once loaded, a new card will render onto the table, providing you the full detail of the scenario you're about to play.
Showing Deployment Zones & Objectives #
Towards the north-end of the board again, you'll see an option to toggle between different scenarios. As you switch between scenarios, you'll see the respective deployment zones (Red/Green/White) and objective markers showing on the map.
Quick Tip - depending on the map you've loaded, sometimes you may not be able to see the objective markers, if you click the "+" button for Obj. Height, this will raise them above your map.
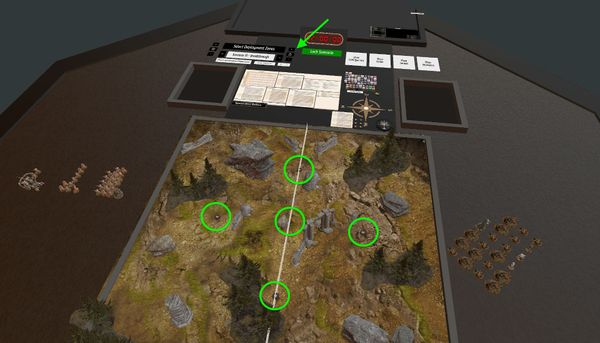
Once you're happy with the scenario, you can select "Lock Scenario". This cannot be undone.
I recommend then going to each of the objective markers, hovering over them and pressing "L" this unlocks them, and makes them fall down to your map's ground level. You can re-lock them again by pressing the "L" button, this will prevent you accidentally moving them throughout the game.
Even once you have locked in the scenario, you can then still toggle on/of the deployment zones by pressing the "Show/Hide Deployment Zones" button.
Playing a Game #
There are two key parts to playing MESBG - moving models and rolling dice, so let's dive in to those two fundamental pieces so you can get gaming.
Moving Models #
Moving a model is as simple as selecting it and dragging it to where you wanted to move it, thought there are a couple of little Tabletop Simulator tricks which will make the experience better.
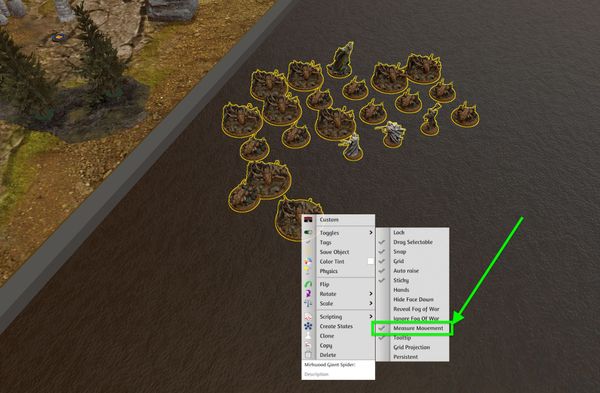
Toggling on "Measure Movement" will then, by default, show you how far you've moved every model on the table, as you're moving it. You can do this ad-hoc by holding down <tab> when you're moving the models, but it's a bit annoying, so having it on by default will just save you the hassle.
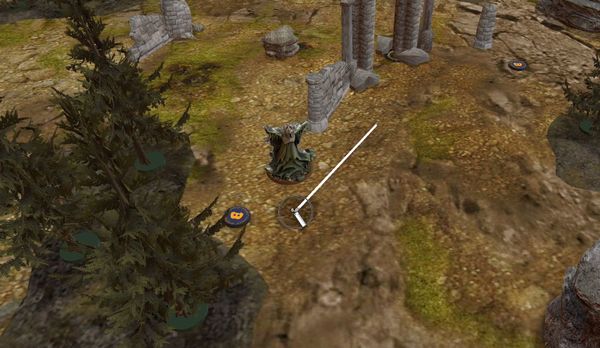
When moving models into combat or base contact with something you can hold both the left and right mouse buttons when moving the model and it will drag along the surface of the board, stopping on collision with other models and scenary.
Rolling Dice #
Now you have the board setup, and you can move your models, the last thing you're going to need are some dice. The game comes with a collection of in-built dice to select from. You can grab one of these and move them to wherever you want to do your rolling.
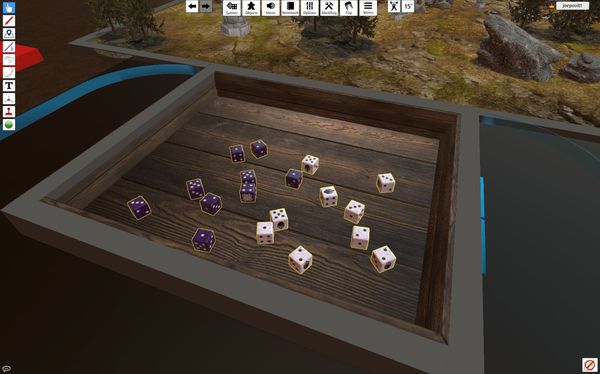
The best thing to do is select a couple of different designs and copy + paste them so that you have a good number of dice for rolling.
You can copy + paste dice using Ctrl + C (copy) and Ctrl + V (paste). Note this keyboard shortcut is actually the same on both Mac & Windows.
Then, to roll a die, you can hover your mouse over one, and tap the "R" button. You can do this for any number of dice at a time, selecting them all first and pressing "R" to roll them all at the same time too.
"I haven't rolled higher than a 4" #
Any time a player rolls some dice, their rolls are showing in the bottom-left of the interface as part of the in-game chat.
Another great feature, designed for those players that love to complain about the luck of the dice (you know who you are), is the "Show Stats" button, found at the north-end of the table. This will display a breakdown of how many 1's, 2's, etc you've rolled in the game so far.
Now you've not got the fundamentals setup for a game of MESBG online!
I'll be publishing a follow-up article soon which will include a collection of useful tips to make the gaming experience even smoother.
Sharing Battle Reports #
A really great part of the MESBG and wargaming community in general is sharing photos and battle reports of your games. What lists have worked well, what tactics are best to use against a particular opponent and list? This is where Siege Ladder comes in.
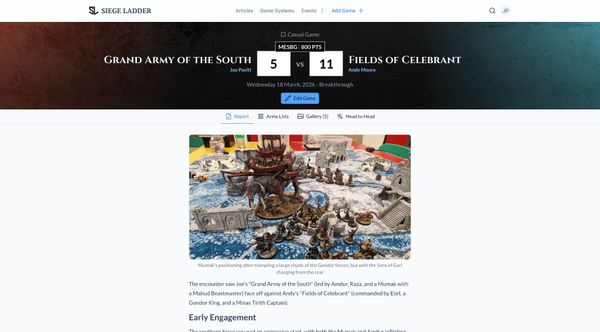
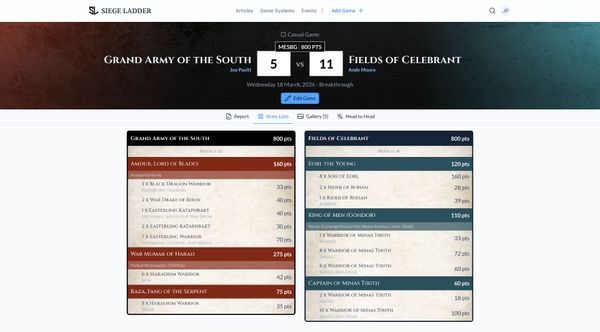
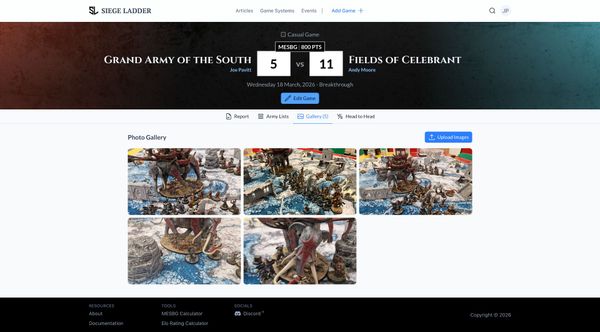
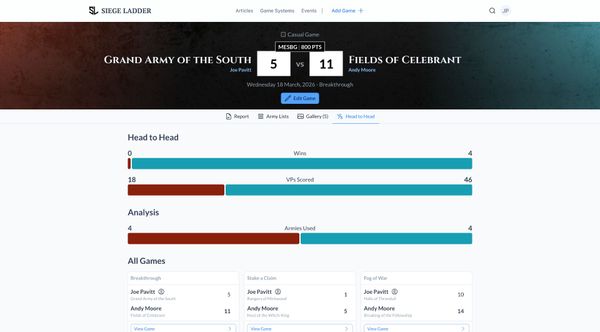
Example battle report published to Siege Ladder, showing the full blog article, army lists, photo gallery & head-to-head stats
Not only is Siege Ladder a full tournament-organising platform, used by the likes of the Great British Hobbit League, it also provides rich analytics on your games, and includes support for built-in battle reports so you can share details on your own tactics and performances.
Once you've recorded the results of your game, you can then write your own Battle Reports using the in-built blog editor (the same one I'm using to write this article). You can include images, videos, interactive graphs and lots more, as well as upload army lists and photos of the game.
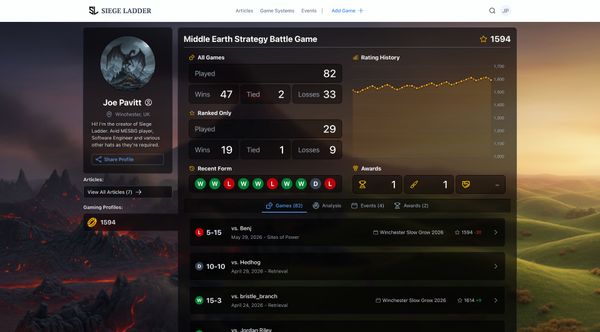
For every game recorded on Siege Ladder, you can decide if they're "Casual" or "Ranked". Any ranked games then directly influence your Elo (the same rating system used in the likes of Chess and Bridge), which provides a tournament/league-neutral value on the standard of your opponents.
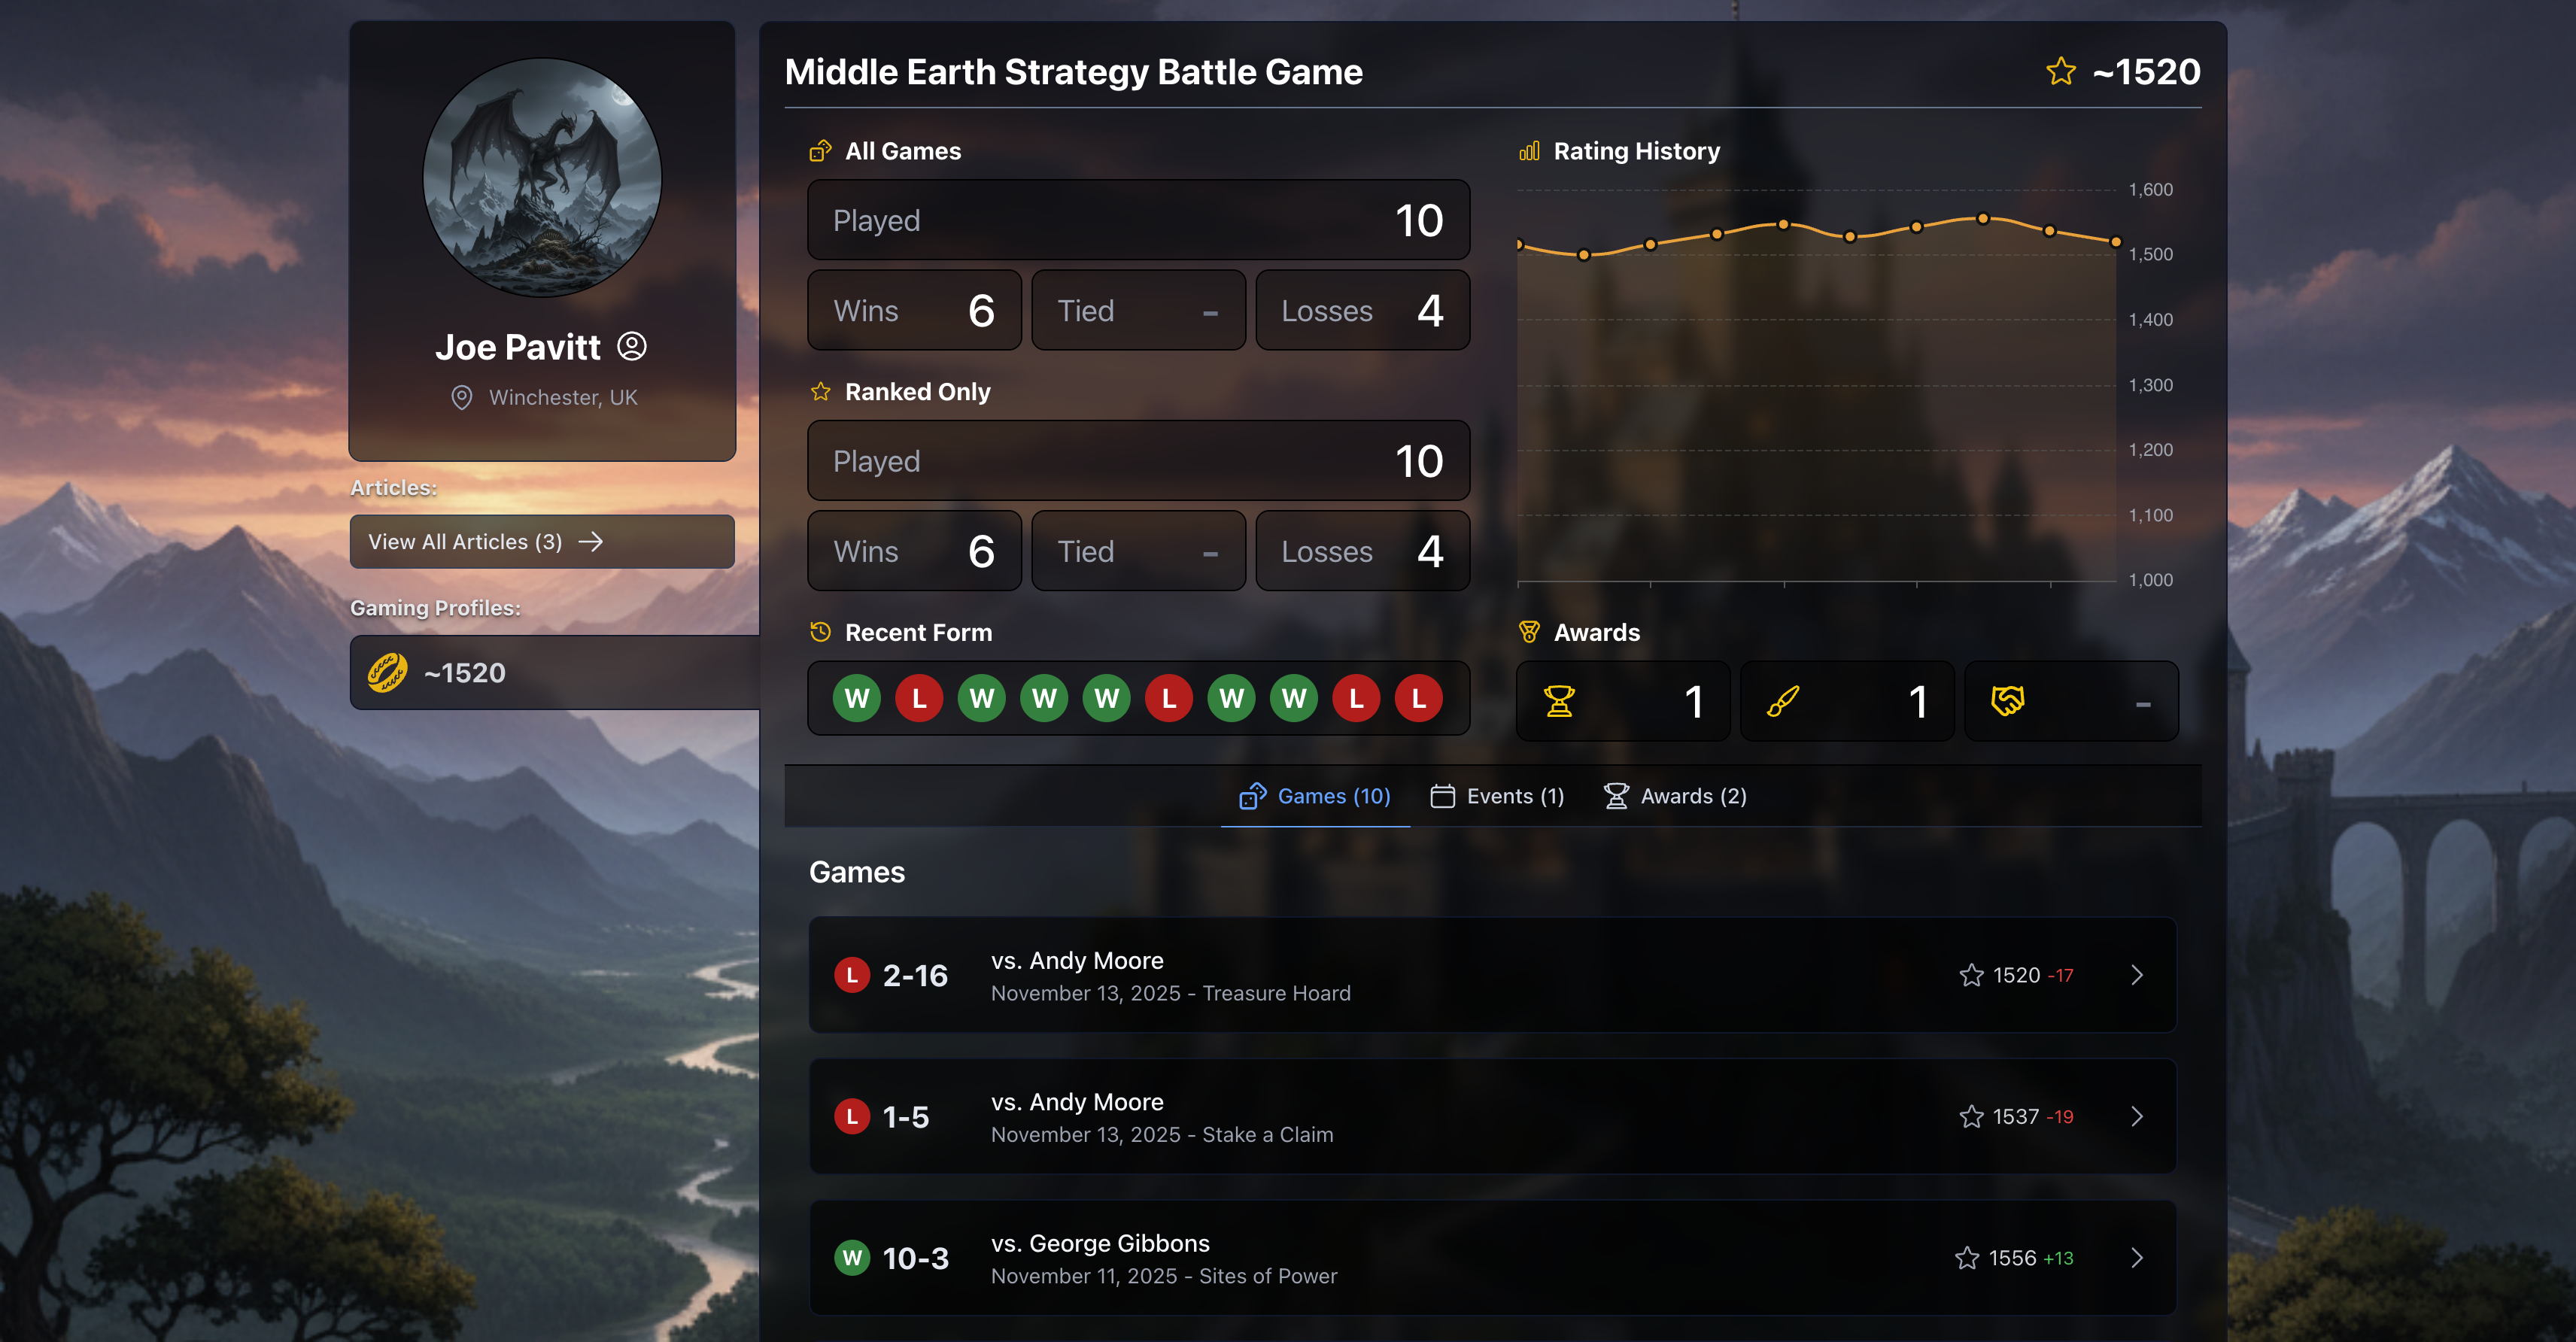
This is all stored on your player profile, also public and shareable (mine is here), where you'll have history of every game you've played, your Elo, detailed analysis on which scenarios you're best at, as well as any awards you've won at tournaments (hobby & gaming alike).
Siege Ladder is improving with new features every week too, and if there is anything else you'd like to see, or see what's already in progress, you can head to the Siege Ladder Discord Server to follow along.