I got back into MESBG a couple of years ago, with many thanks to Steve (Hedhog), my opponent in this game. He is a 40k player generally, as well as AoS, Shatterpoint and many others. I'd previously managed to persuade him to at least get his own army, which he did with the Depths of Moria, and a particularly beautifully painted Cave Troll.
In the three games we had with the Depths of Moria, it was fun, but the Balrog can sway a game heavily in one direction or another, so I'd said for a while we should have a "normal" game of MESBG and Steve finally agreed.
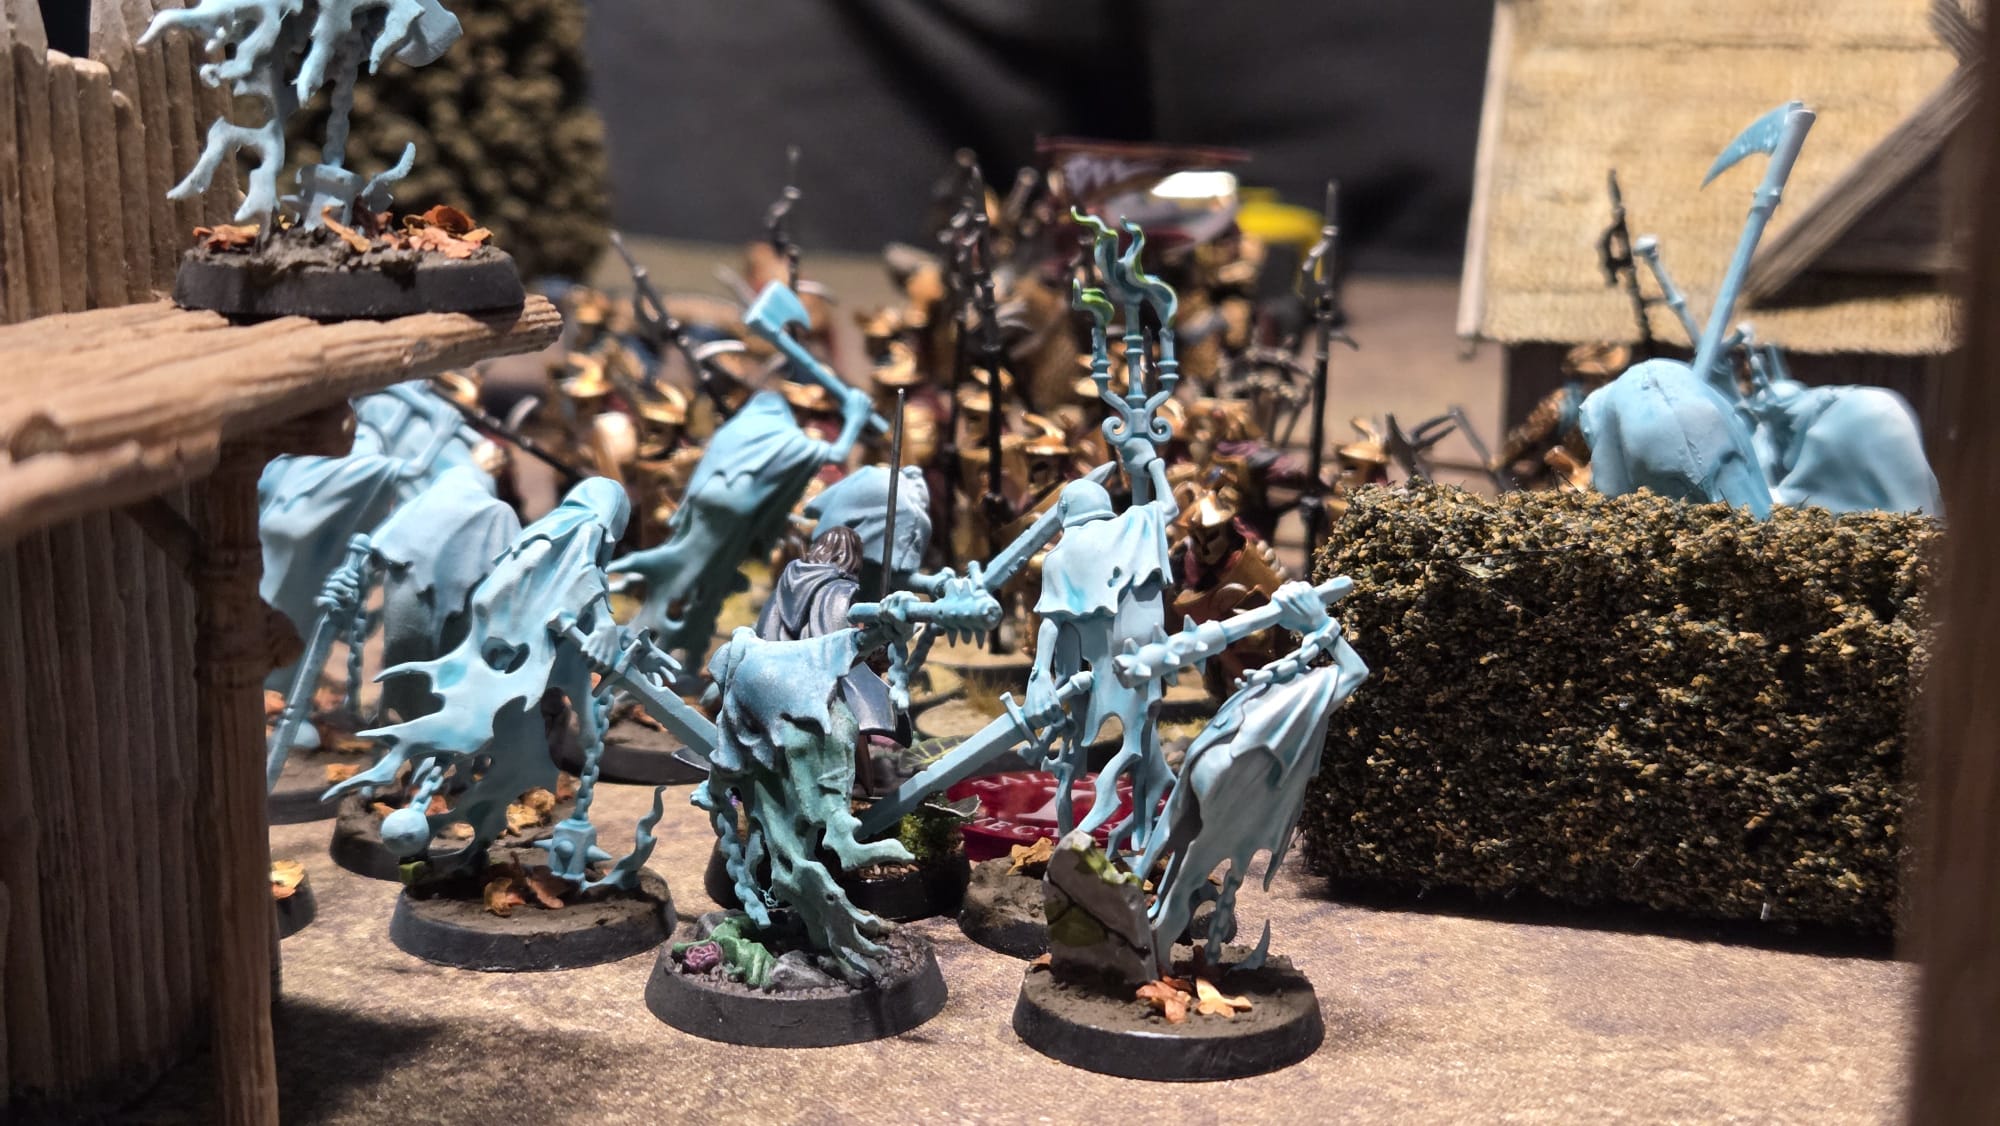
When looking for an army for Steve to field, we realised that his Age of Sigmar Nighthaunts would act as a great Army of the Dead proxy (also built on 25mm bases), so he borrowed an Aragorn from me, I wrote him out a list that matched his proxies, and we set out in a Grand Army of the South vs. Return of the King battle.
Breakthrough - a game lost on deployment? #
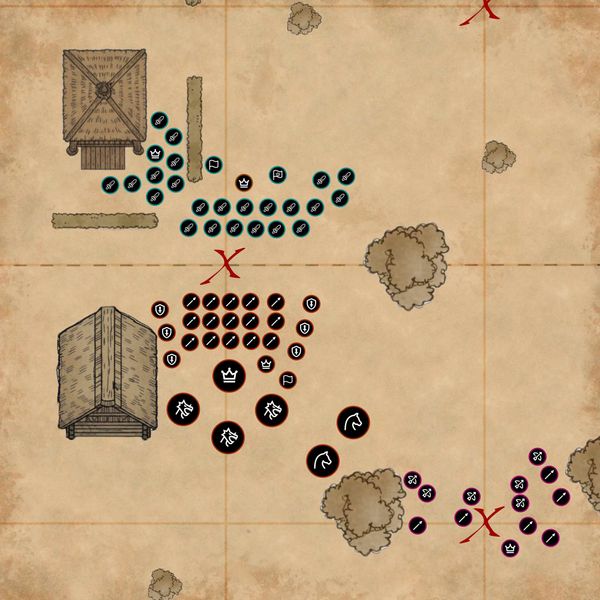
Steve came for a fight, and the evidence was clear by the deployment. Playing with Easterlings as the core of my army, I knew I had to deploy 3 lines deep and make the most of my Phalanx, in hindsight though, I made errors by putting the Shields on the flanks (I didn't plan ahead and deploying warband-by-warband meant it was too late to correct it).
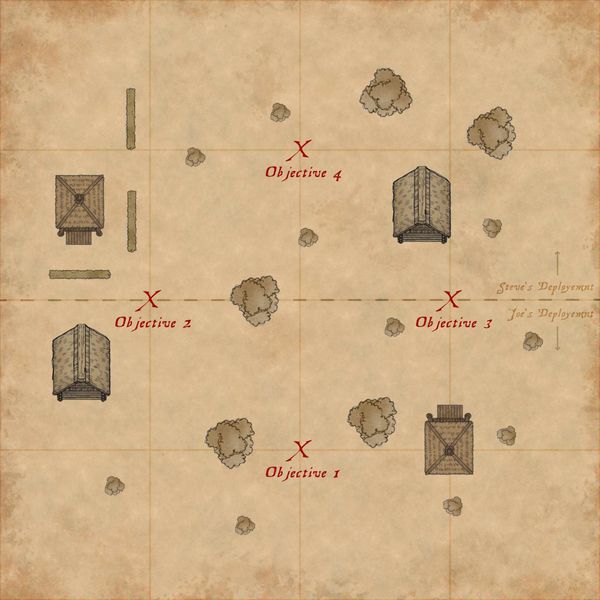
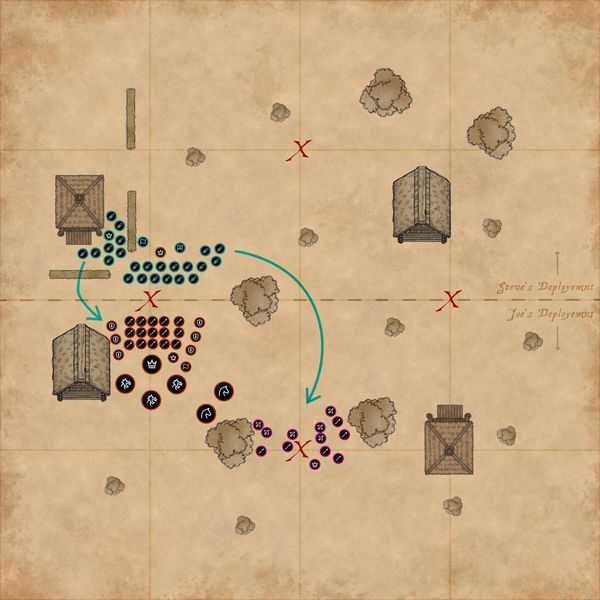
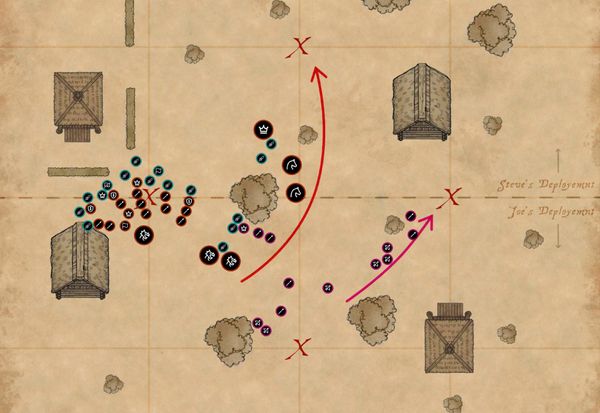
The board layout and deployment, zoomed into the left-centre of the board.
Steve had set himself up very well with the terrain, and later, many times, made the most of the fact he could just pass over the hedges (and houses) we had positioned around Objective 2 to give himself favourable positions against my defensive line.
I was expecting Steve to spread a little more, but I can see why he didn't. I had the numbers, he has the higher defence, and the mobility to out flank me. With my numbers though, I was hoping I could pin him enough, get rid of a few numbers from his mass of bodies, and get him on the counter attack with my cavalry.
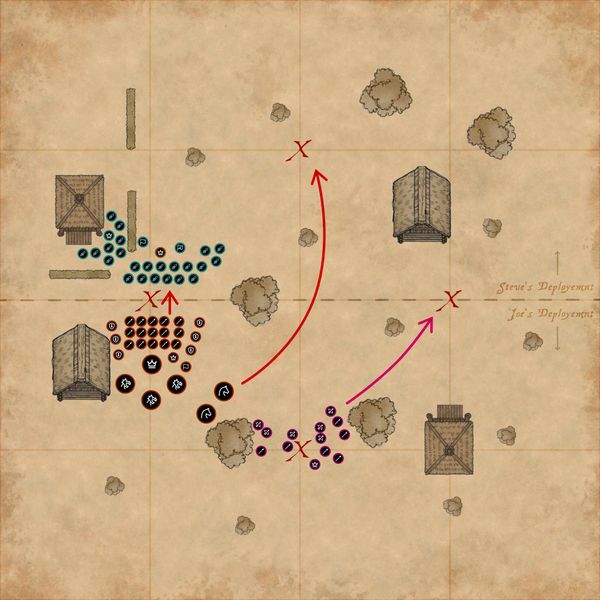
Left: My expectation from Steve; Right: The plan I was hoping to execute.
On the left I've shown where I was expecting Steve to play given his deployment. Coming at me over the hedge, and then sending a few guys round to deal with my Haradrim sitting and defending their position at the back. On the right, my plan, pin him in enough and distract him with my horde of Easterlings, whilst slowly manoeuvring my Haradrim towards Objective 3 on the right, and use my cavalary at the very end of the game to compete for Objective 4.
The Value of Shields & Phalanx #
The game began with an almighty clash of front lines. Steve used his mobility well, and came over the hedge attacking my left flank, but he didn't do a lot on the right, so I managed to, in most places, keep my Phalanx in shape and benefit from two ranks deep of pikes. Where possible too, I distributed out my Black Dragons, with the plan of getting F5, but I ended up utilising Amdur elsewhere and keeping him back a little, so there ended up being a fair few F4 roll-offs in the duels, because of the "Fight for us and regain your honour" army rule, giving +1 to Fight within 3" of Aragorn.
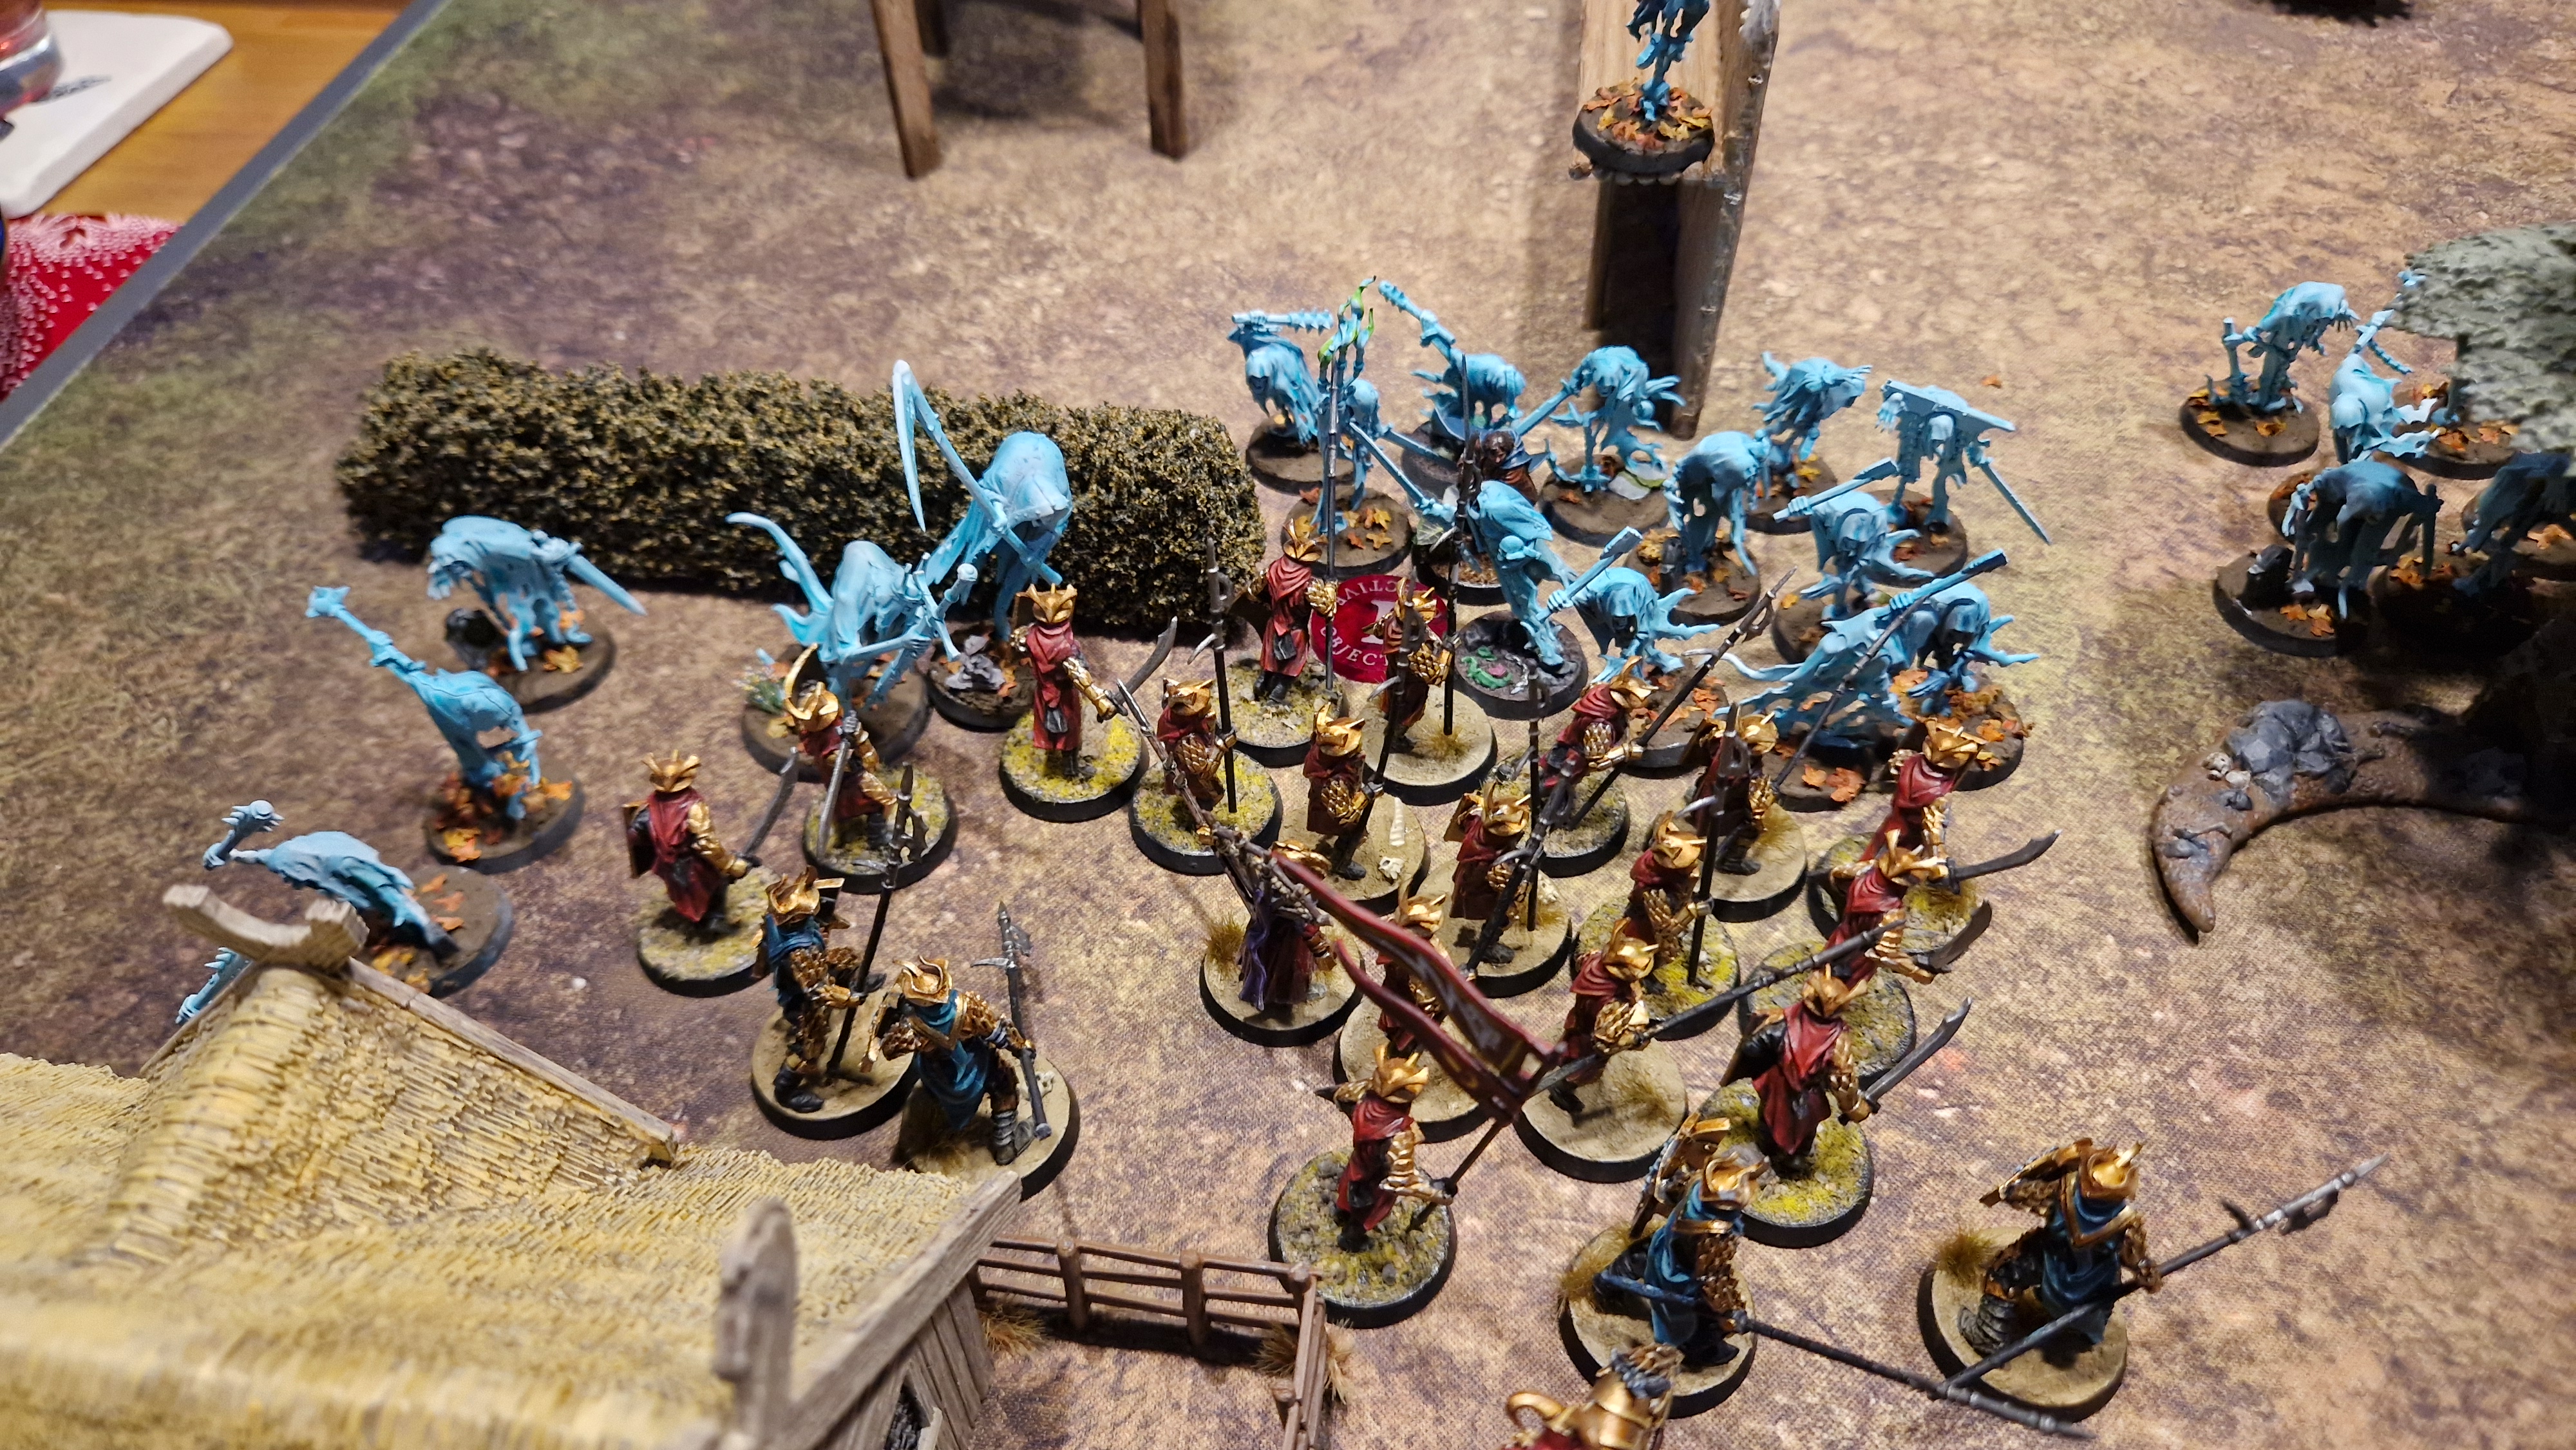
It was in this first round I realised the mistake I had made when putting Steve's list together for him... no Shields.
Rather than me wounding on 6/4+, my Easterling infantry, which already mostly outfought him, was wounding on 6's, and boy did I roll some 6's. I managed to remove a fair few Warriors of the Dead in those first few rounds, and it gave me a big upper hand early game.
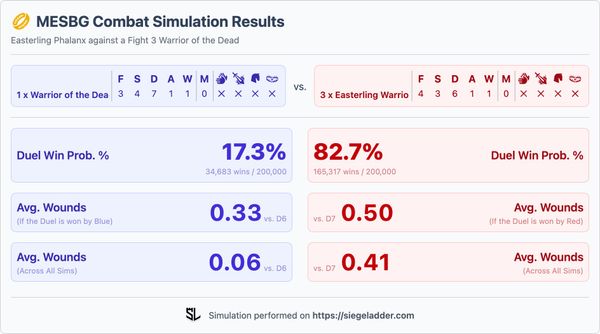
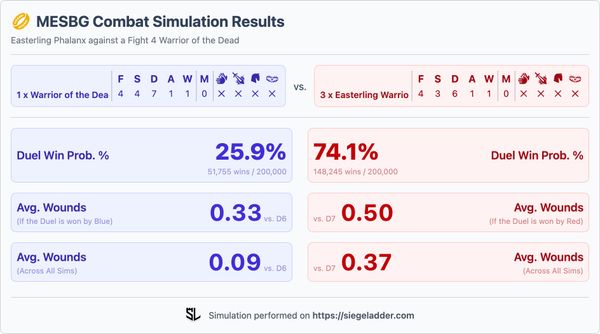
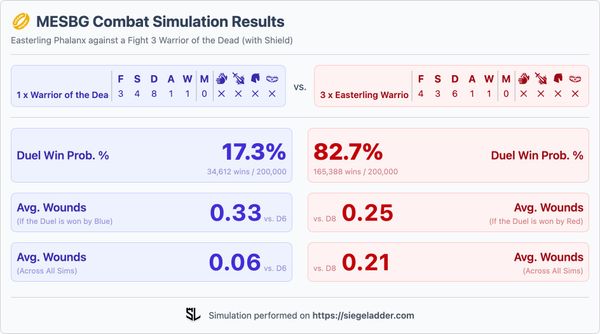
Simulations of Warrior of the Dead vs. Easterling Phalanx, and showing the importance of bringing your shields!
Here we can see the impact of a Warrior of the Dead having the shield, halving the number of expected wounds each round, which would have bought Steve a lot more time to flex his speed and gain more board control. This does also hammer home the importance of the Easterling Phalanx, they need to be a tight pack, but it's very effective at staying solid, shown here as they win 83% of the duels against a lower fight model.
The Scene was Set #
After a few rounds, enough warriors had fallen, that I was getting the upper hand, though my left flank was looking particularly weak as the King of the Dead and the Herald start chopping away at my swords and pikes. Aragorn, did get a few kills too, but definitely felt under-utilised, albeit he was having to use his free point of might every round for Heroic Moves, after I won the first 6 rounds of priority (sorry Steve).
As I started edging my cavalry and Haradrim forward, Steve realised he needed to spread. My plan from earlier was working, by this point, my Haradrim had been edging 3" at a time over to Objective 3, and my Cavalry were over the half way line with Amdur and causing havoc to his flank.
We were reaching time on the game, and Objective 3 was guaranteed to be mine, there was no way he'd be able to get over in time. I then couldn't see a way for him to break through my ranks and get to Objective 1, and did a Heroic Combat at the end with Amdur, to push off the lone Warrior of the Dead he was fighting in the top-half of the board, and secure Objective 4 for a nice 5 x VP bonus.
Overall, the game finished 9-3. Steve had scored 1 VP for Objective 2, on the left and 2 VPs for taking out my banner (with a nice Heroic Combat from the King towards the end of the game). In return, I had scored 1 VP for securing my own objective, 3 VPs for holding Objective 3 and 5 VPs for capturing Objective 4 on the very last turn. Next time though, the Warriors will have shields, and I think it's going to be a very different game.