
Deployment & Initial Plans #
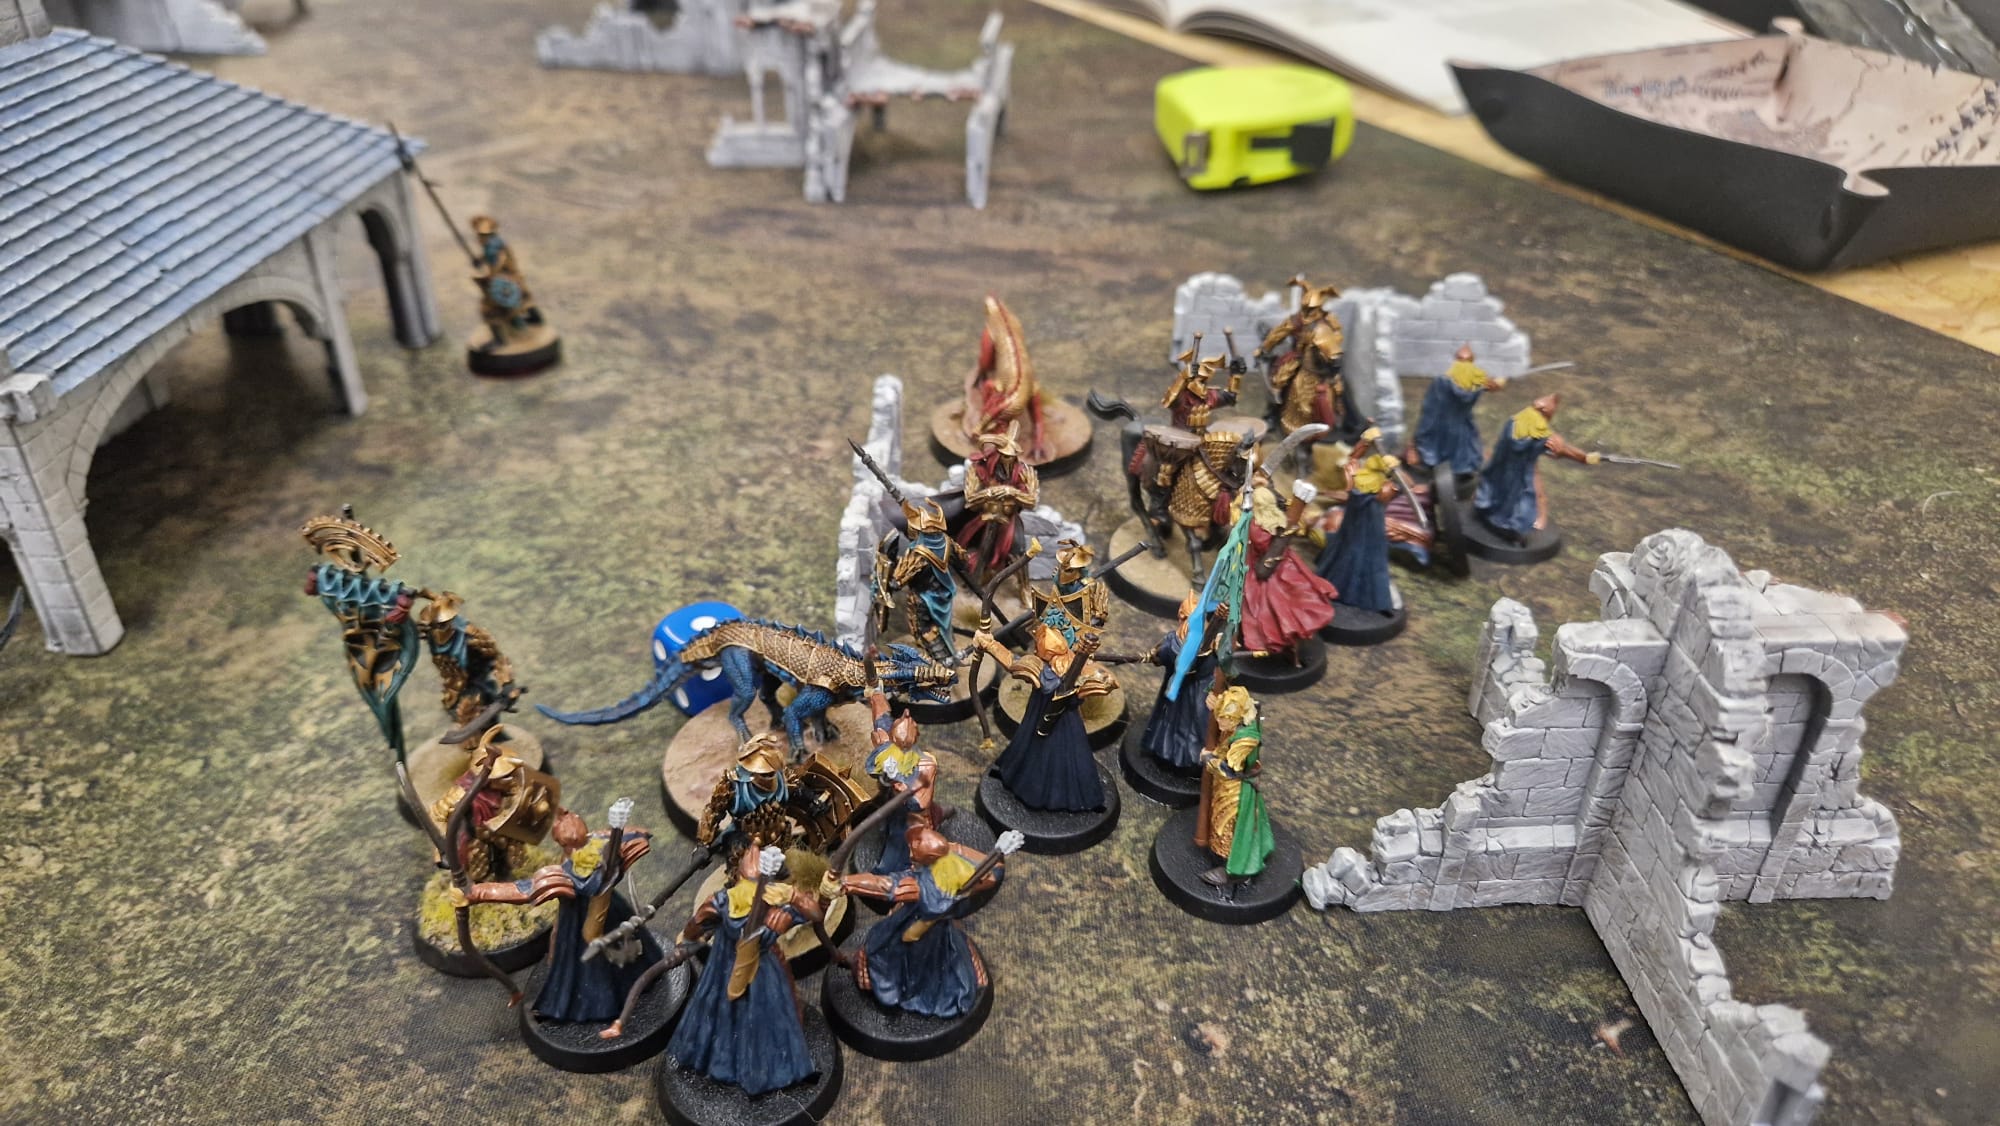
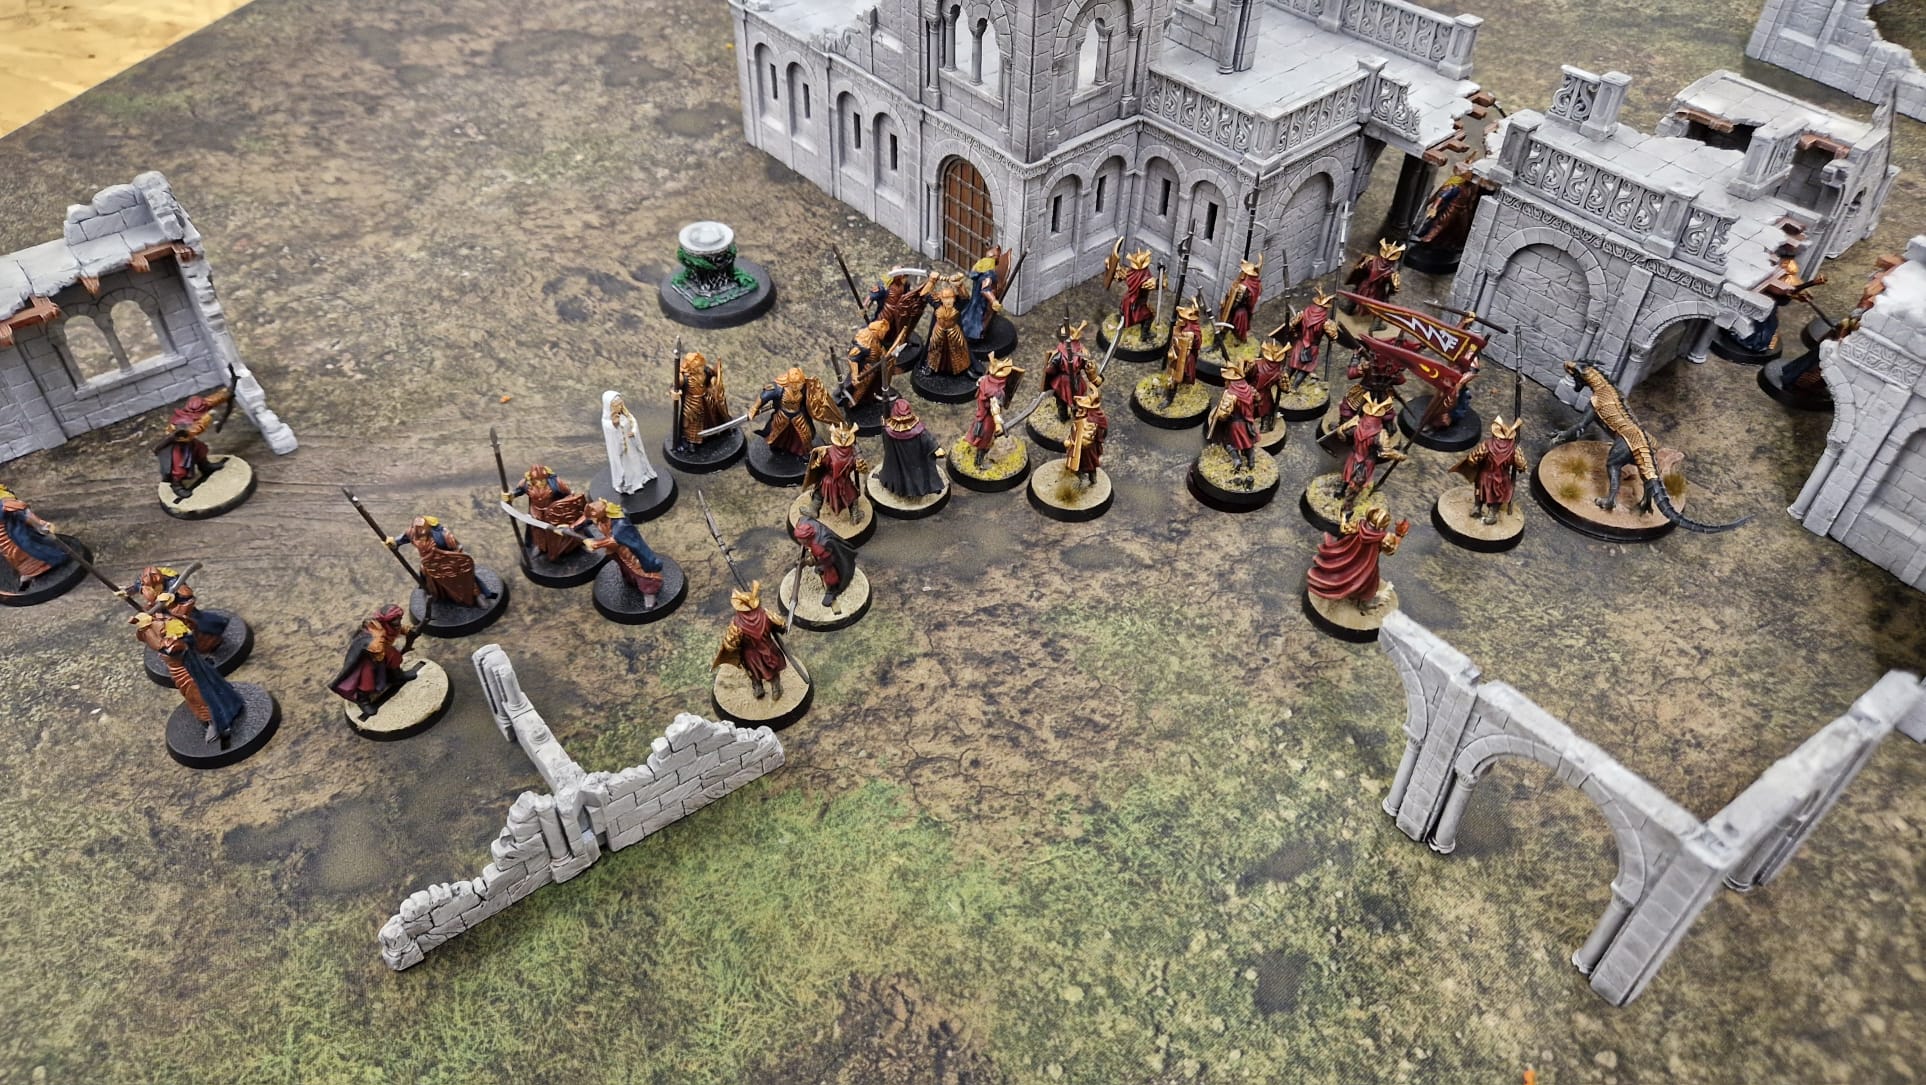
This was my first ever time playing Convergence, and as we setup, I really liked the look of the board and the game at hand. With alternating warband deployments into opposite corners, order or warbands was important. I chose to setup Amdur with his elite Black Dragons, War Drakes and Kataphracts in the top-right of the board, then having my main mass of infantry in the bottom-left, supported by Raza and Khamul.
Ben seemed to setup fairly heavy in the top-left, with Galadriel, Rumil (not quite picture below, but was positioned above the top-left ruins) and the majority of his infantry in the top-left zone. Then, he had Haldir, 6 x archers and a few sword/shield infantry for support too, positioned in the bottom-right.
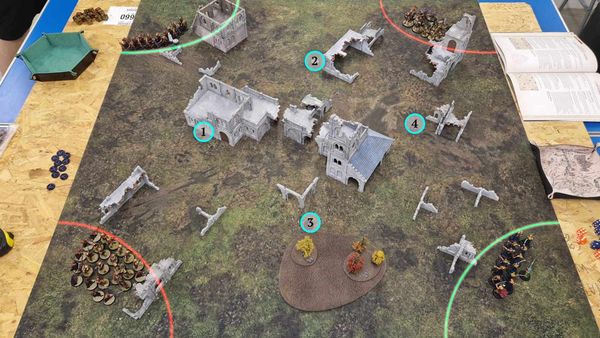
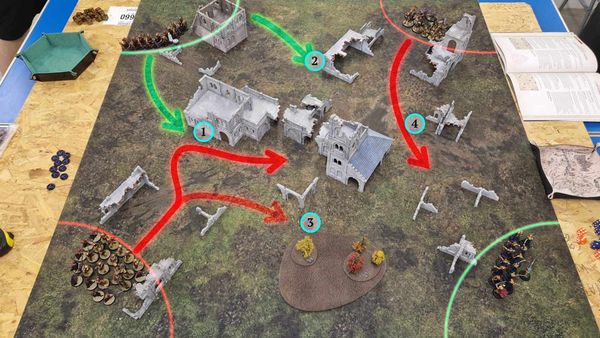
The initial deployment (left) and the plan I was hopign to execute, marked with the red arrows. The Green arrows show what I was expecting from the top-left, but I was unsure what Ben had planned for Haldir in his troops in the bottom-right.
Seeing how light Ben had left Haldir, and given the pace I had with a mounted Amdur and some Kataphracts, I set my eyes on taking Amdur down there and wiping them out as quick as possible, whilst trying to pickup Objective 4 on the way with some trailing/supporting infantry.
With my core infantry group in the bottom-left though, I noticed that Objective 1 was slightly behind the building, which gave me an advantage if I could get their first. If not, it wasn't the end of the world, and Ben was still going to be aiming for the middle of the board, and I could hold that position well and slow him down utilising Phalanx. I was fairly sure I could grab Objective 3 with a couple of lone Haradrim, as Haldir was likely to get distracted by the horses and 3 x war drakes heading towards him. I had decided Objective 2 was a waste of time, pushing Amdur and his forces round there probably would have won me the Objective, but I didn't want to risk Galadriel and her forces also sweeping over and me getting caught in a mass brawl.
Objectives Secured #
After the first move, I was fairly happy with the board position. I managed to hide Amdur and he Kataphracts in behind the ruins on the right, and to my surprise, Haldir and his infantry stayed put, though this ended up being a smart play, taking out 3 x Easterling Shields in one round of shooting.
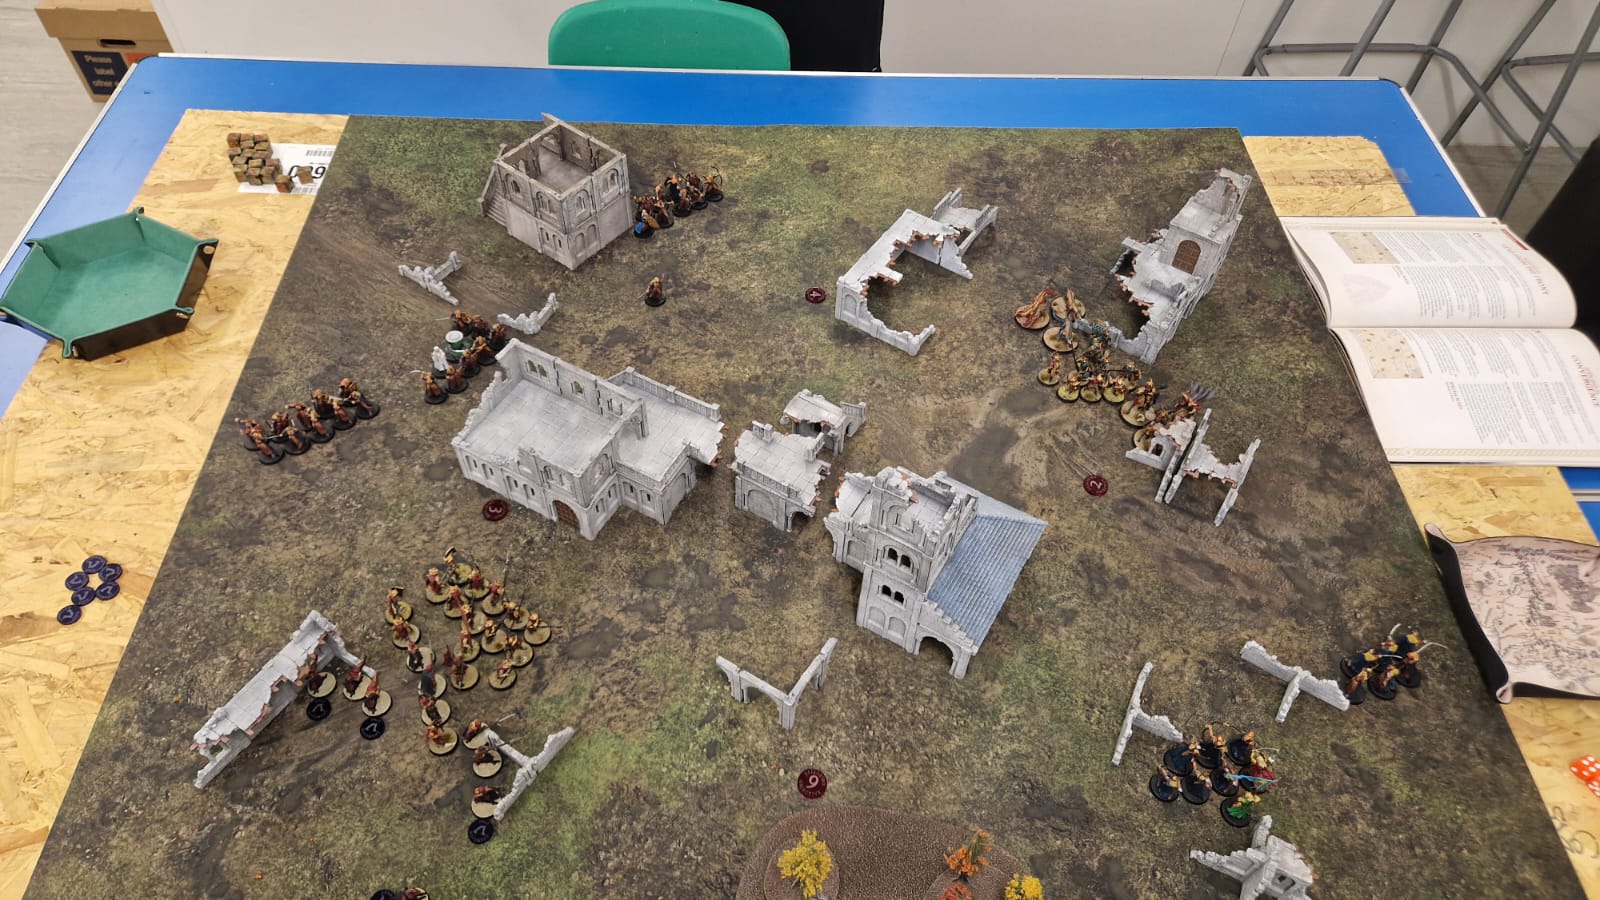
On the left, I got myself within range of the Objective Marker so that either, I was getting there first, or, if Ben was to get his infantry there first, i'd be trapping them up against a wall pretty quickly.
The following turn, I got the priority, and secured both Objective 1 and 4. I also shifted a couple of Haradrim towards Objective 3 now that I knew Haldir wasn't going to be reaching that any time soon, to secure Objective 3 by Round 3.
"May the odds be ever in your favour" #
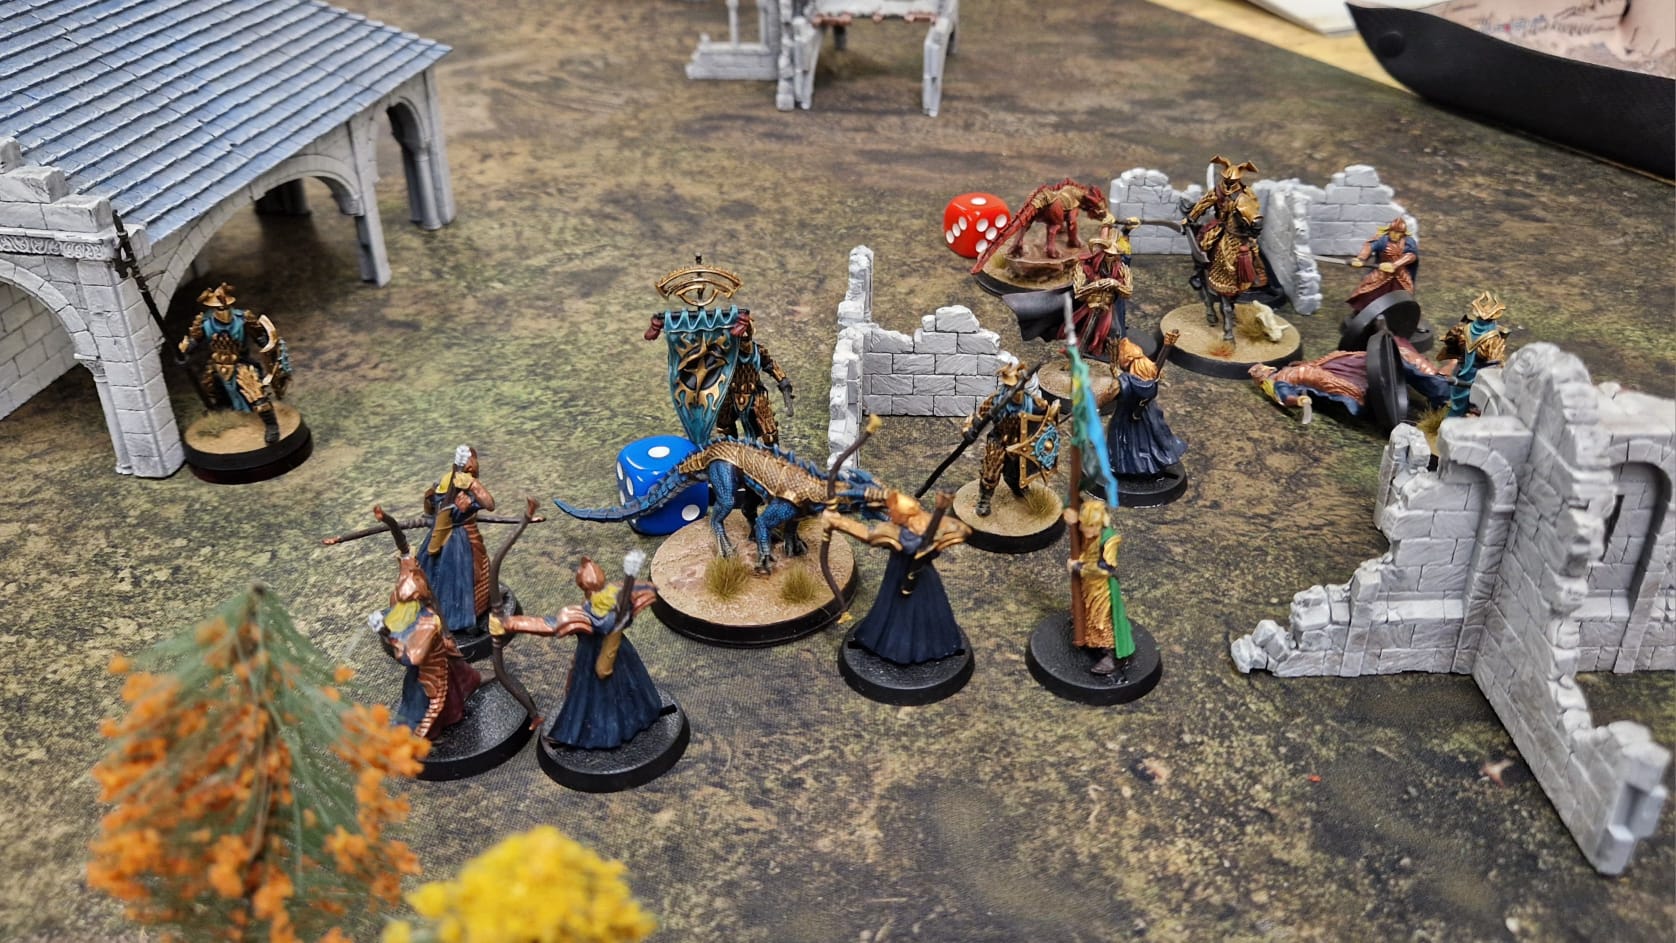
My great plan to wipe out Haldir and his crew hit a snag. Ben was retreating slowly (which helped for my objective control, but nto for taking out his forces) and holding his ground inside the ruins, so I had to have at least one turn of Amdur and his fellow cavalry in the open before I could get the charge off.
5 x shots from his archers and 2 from Haldir, with an in the way way for some ruins, and the Kataraphract I'd positioned in front. Then, with my Gleaming Horde (D7 Amdur and D6 armoured Horse, he'd need a 6 to cause the wound), the odds were very much in my favour...
...Screw odds. He hit with all his shots, got half of them over the wall, 2 past the first line of Kataphract with both then hitting the horse... and he got that wonderful 6 to wound. Amdur was dismounted, and I needed to adjust my plan.
The other snag was a lone Black Dragon Warrior, who had picked up the objective just loved rolling 1's (two in a row in fact) for the Heirlooms of Power rule in this scenario, meaning that he was transfixed and left behind. I sacrificed a couple of War Drakes to offer a wall of defence against some more archers coming round the top having just taken Objective 2 too.
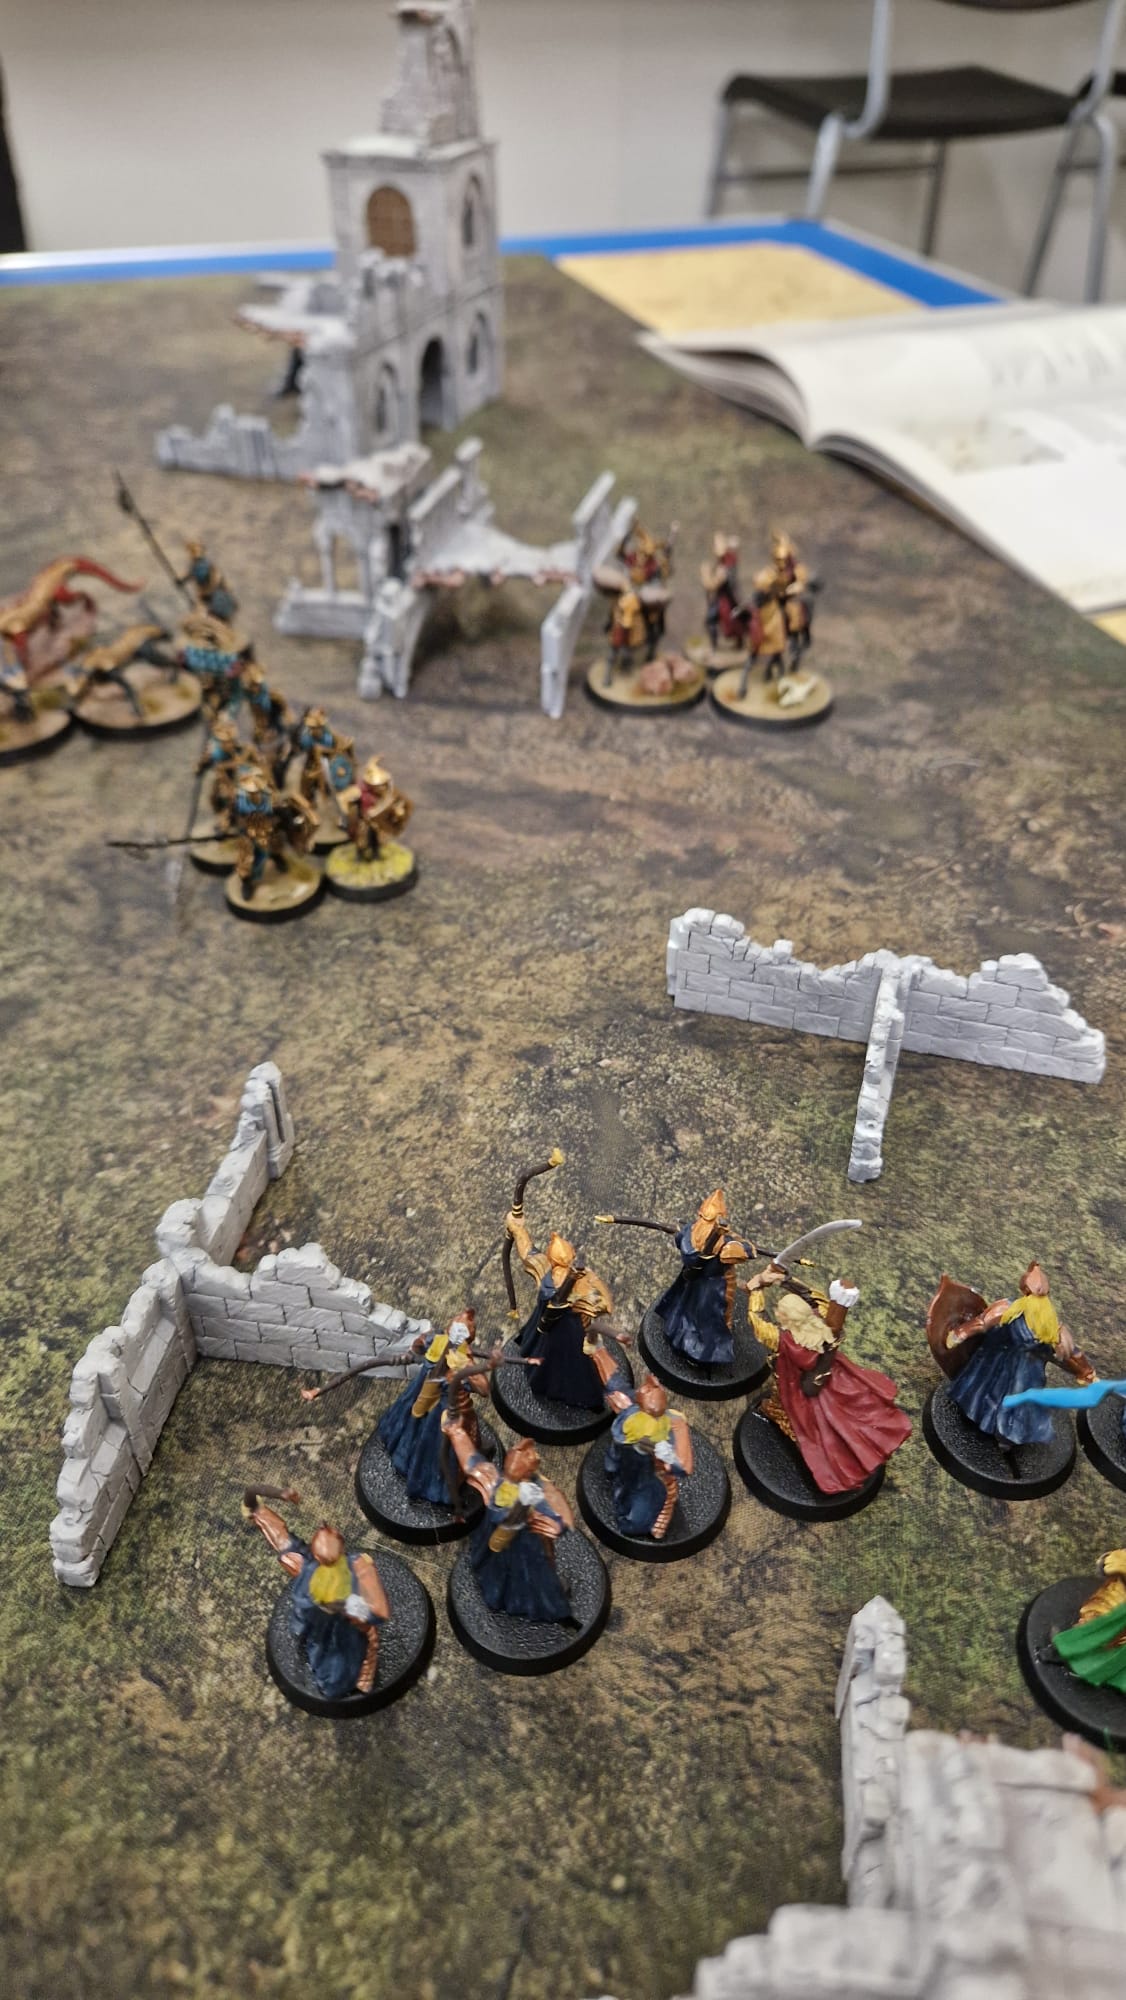
(Image 1) Amdur taken off his horse by the archery; (Image 2 and 3) The Easterlings pile in, with the Kataphract causing some damage, and Amdur taking out Haldir.
I decided to persist with Amdur, and a luck of the dice swinging back in my favour saw my Easterling Kataphract (on the charge) knock down 4 x Infantry and Haldir. Whilst I didn't get the kill, I did manage to get a lucky 6 myself with Amdur, climb over a low-line of ruins and get into Haldir, making the most of his inability to Strike me due to his Prone state. It worked, Haldir was defeated, though by this point in the game, we only had about 20 minutes left, so getting Amdur into the thick of the fighting wasn't going to be an option, though he had done his job.
Phalanx Holds Strong #
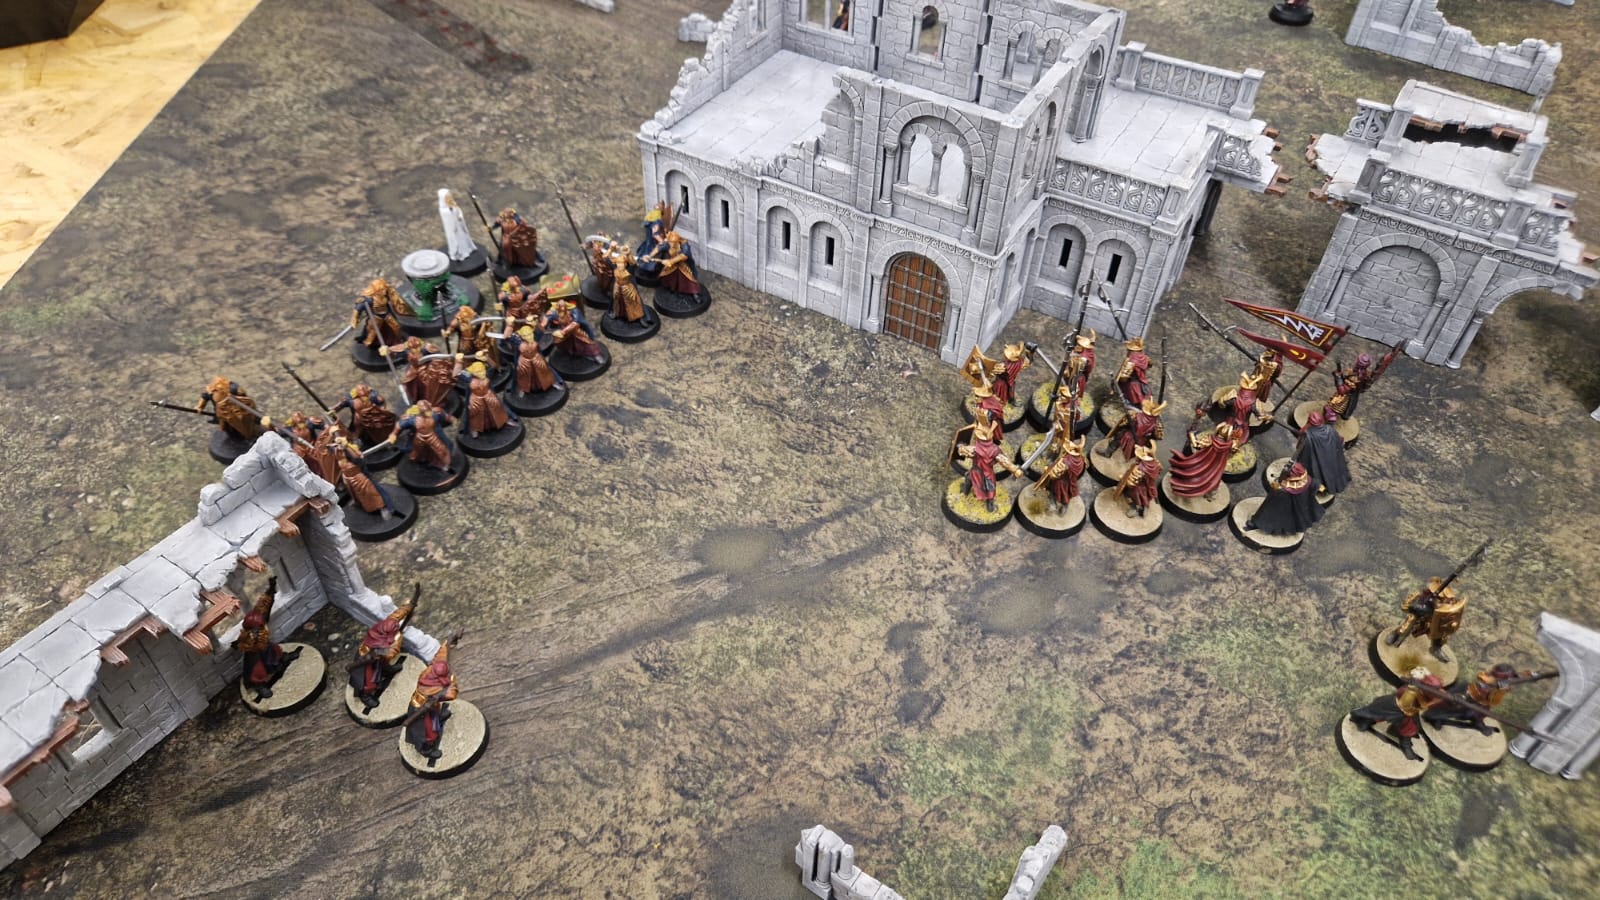
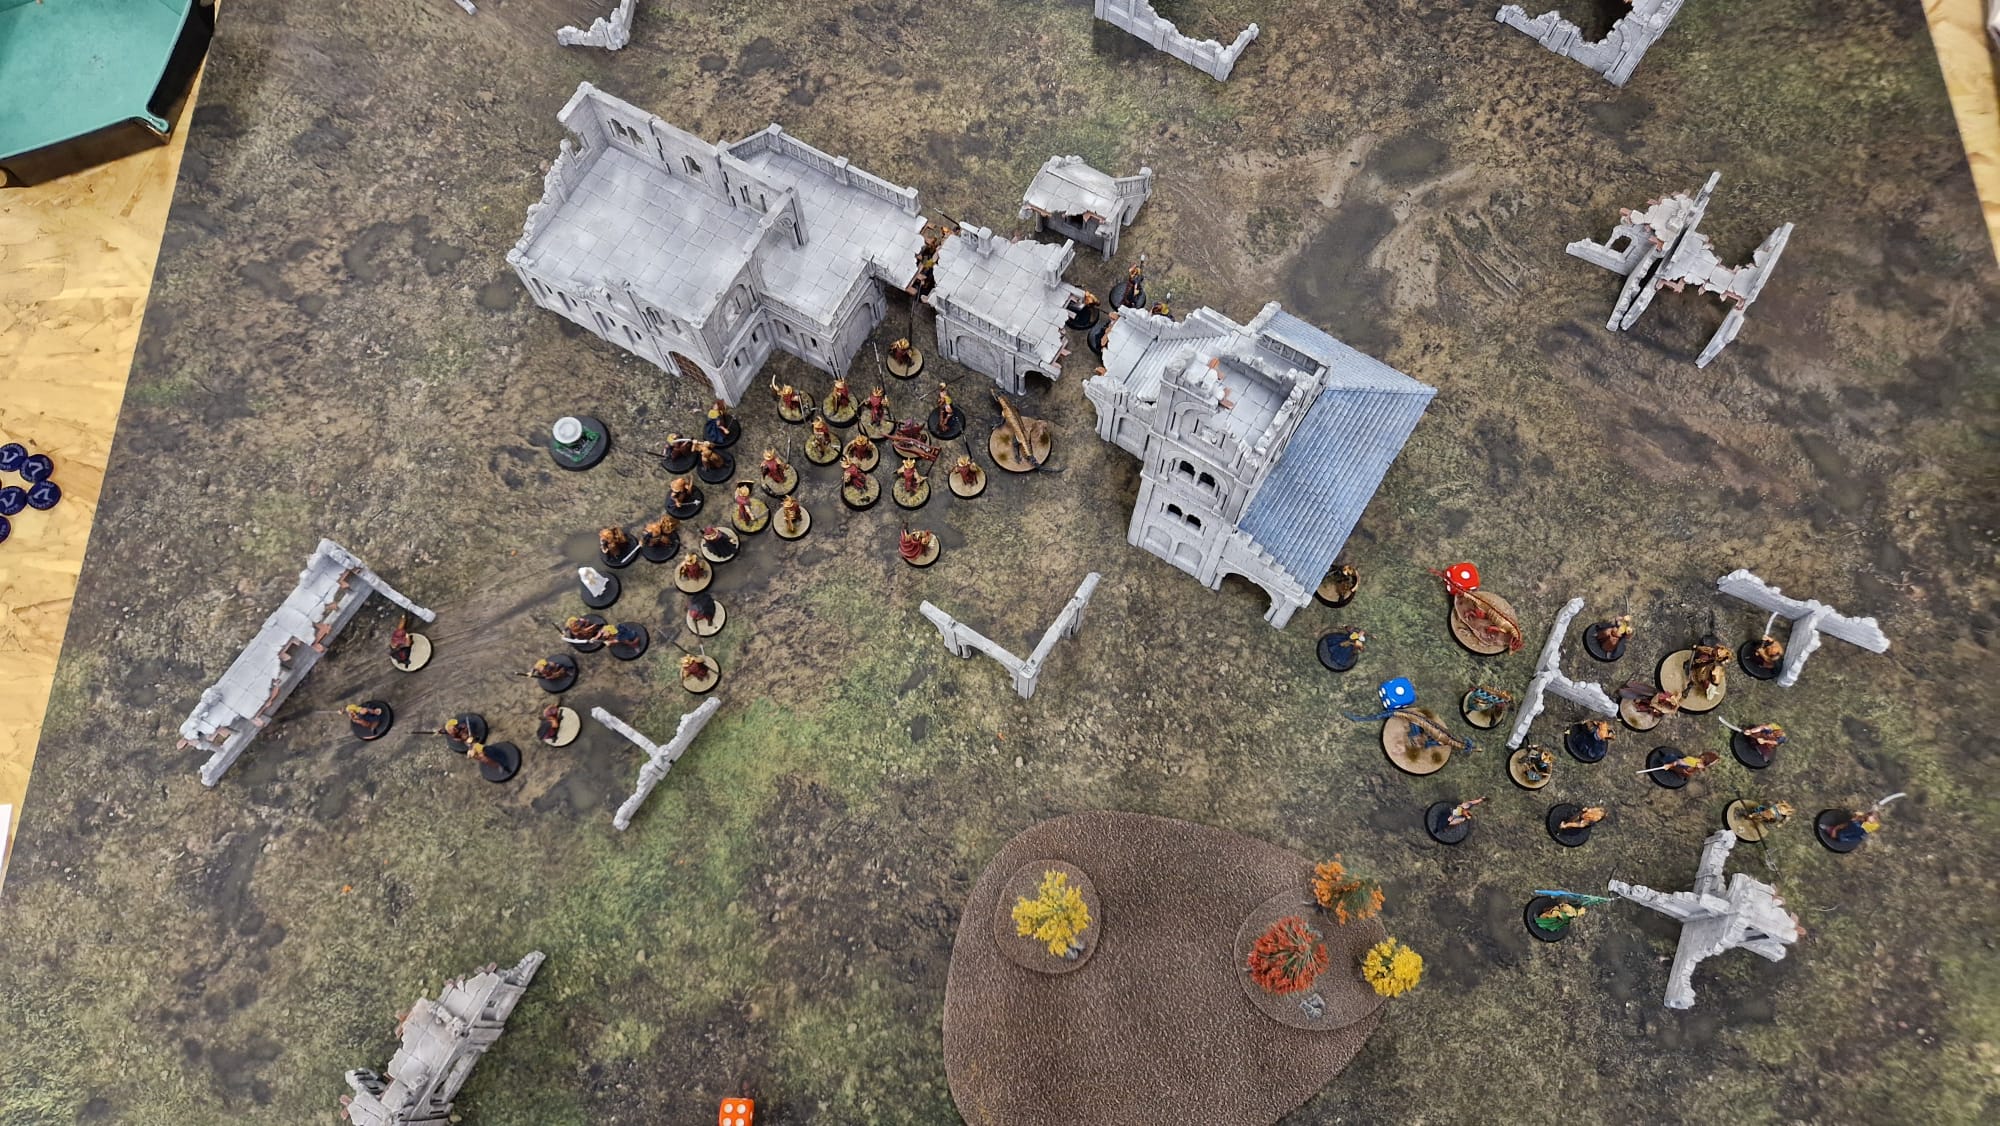
Meanwhile, back over between Objective's 1 and 3, I had managed to build a strong Phalanx line, ready for the Elves to charge at me. Now that they were all lined up, I realised I didn't have the model count advantage I'd hoped for, so my plan was to use Haradrim as a bit of a nuisance to trim off his wide attack line, so that I was 1 on 1 in the front line where possible with my Phalanx, utilising my 2 x layers deep of Pike support.

Progression of the front lines clashing, Haradrim being annoying on the flanks and preventing the wrap around my Phalanx.
Another really important play that came off was with Khamul and a lone Easterling Warrior. I'd noticed Rumil and his crew were trying to flank me through the ruined archways. With a priority in my favour, I chose to do a Compel agains a lone warrior of Ben's and positioned him to that his forces couldn't come through. That bought me a turn with which a lone Easterling Warrior to get then defend that doorway, and 2-3 turns of Shielding and holding them off would give me the time I needed to removed a few more of Galadriel's forces.
By this point, I had managed to pull over another War Drake, who then secured/defended the second archway, and although Rumil had broken through at this point, I had Raza setup and ready to Strike. I'd chosen Rumil at the start of the game for Raza's bonus of 2 to his Fight Value, matching Rumil on Fight Value of 6. An Heroic Strike on my part gave me the advantage, and whilst I couldn't surround him, I did managed to get him 5 on 1 with some additional supports on my side. It wasn't quite enough to kill him, but I cleared his Fate and all but 1 wound, which then fell the following turn.
Time Runs Out #
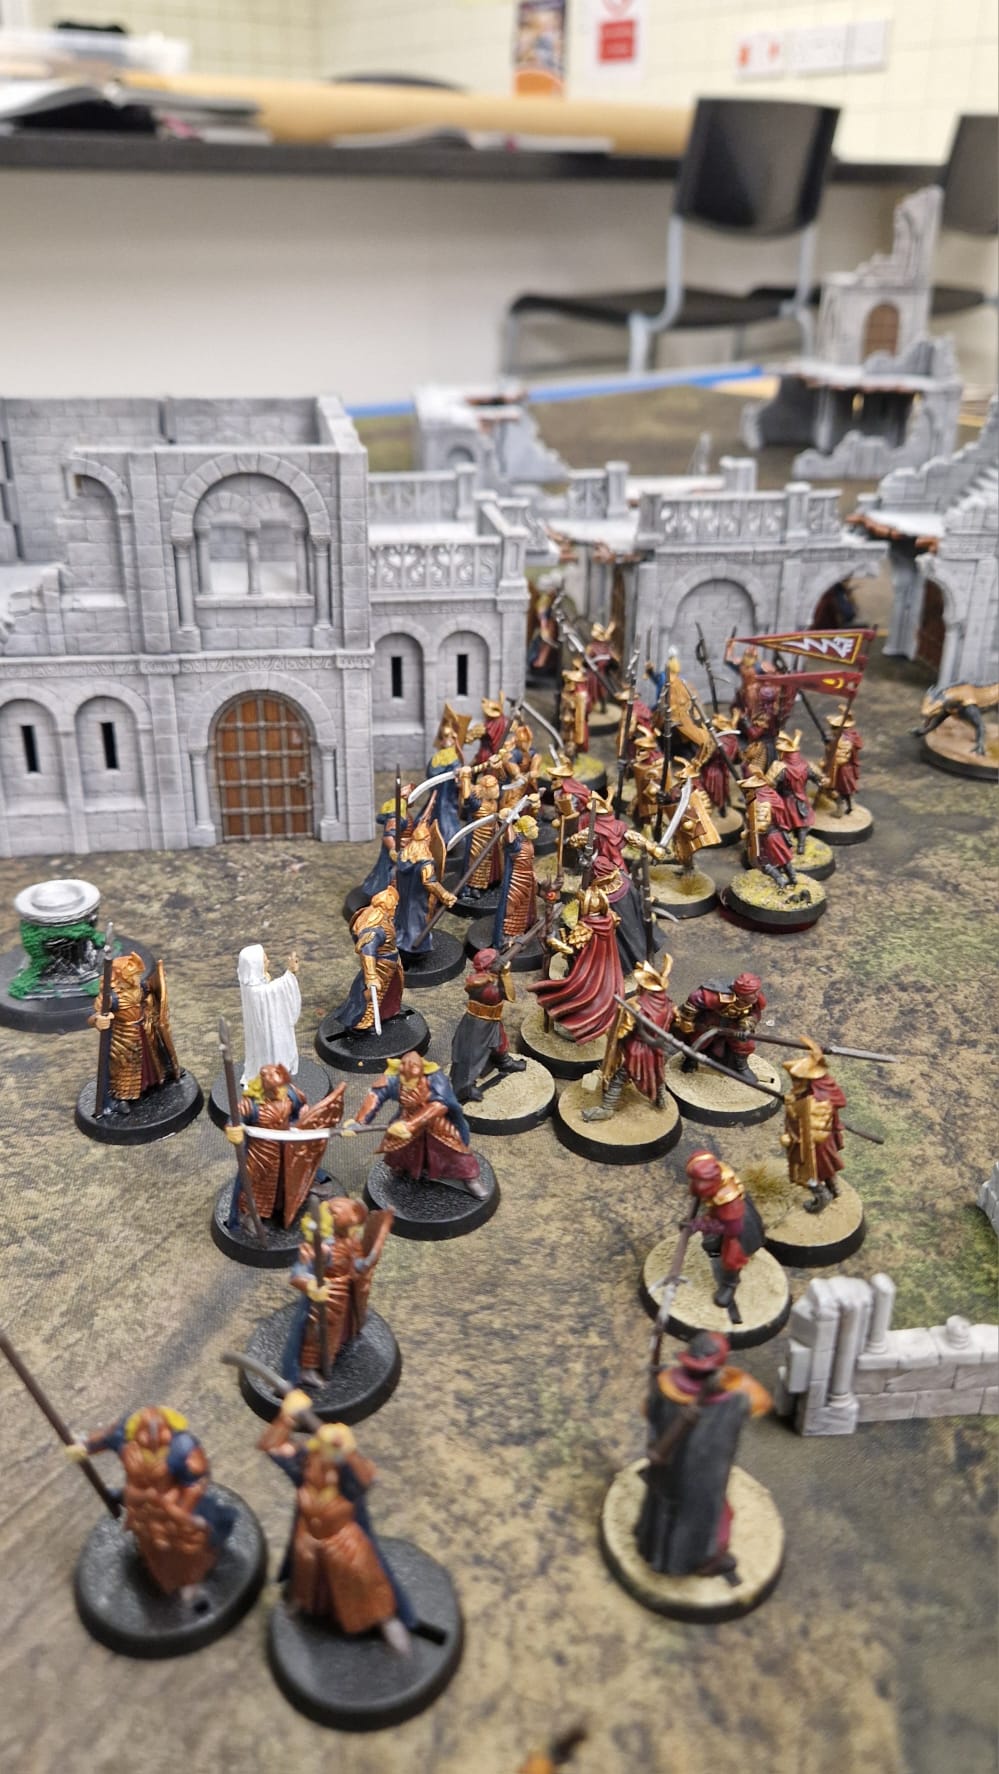
We were running out of time, and whilst I had 3 x objectives under control, I wasn't 100% sure of victory. On the very last turn 2 x Elves had managed to pin my lone Black Dragon who was straggling behind, and I just needed to survive. I lost the Duel, but luckily, Ben didn't see a 6, and so I managed to secure 1 VP there with Objective 4. Objective's 1 and 3 I had just managed tog et within 6 inches of the centre, securing me an additional 6 VPs. My last 2 VPs were to come from the final count of models in the middle.
We had to take out the terrain for this one as it was incredibly tight, but 10 models to 8 (with my War Drake counting as 2 models due to his Domination rule) gave me the edge with an additional 2 VPs, and got my up to 9 VPs.
In return, Ben score his 3 VPs with Objective 2, which was never really under threat at all, and safely hidden away in the ruins within 6 of the centre.
Overall, and excellent game, and the first time for me playing this scenario, and playing against Ben. Looking forward to more!